Last Updated: March 21, 2025
LoginTC OpenAM Connector allows administrators to incorporate two-factor authentication within their OpenAM authentication policies.
Explore how LoginTC integrates with OpenAM below.
Subscription Requirement
Your organization requires the Starter or Professional plan to use the LoginTC OpenAM Connector. Explore Pricing Plans
The following diagram illustrates a seamless LoginTC OpenAM Connector integration into an existing corporate network protected by OpenAM. The circled numbers indicate the step in a typical authentication flow.
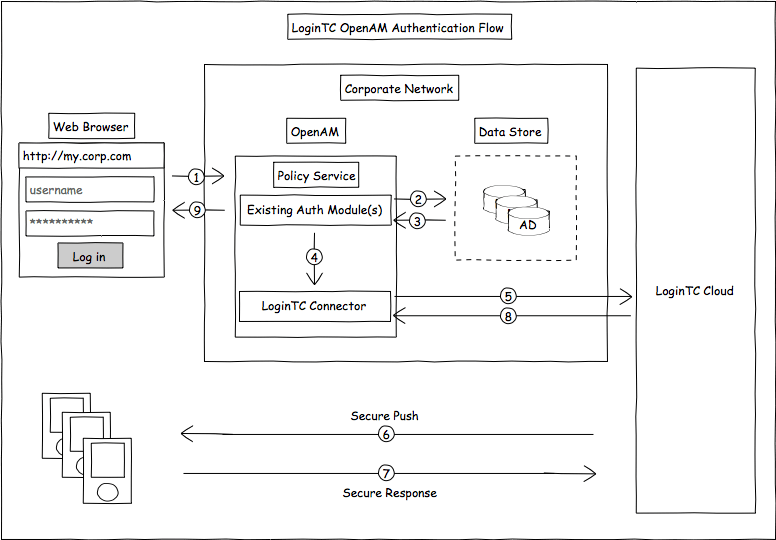
The LoginTC OpenAM Authentication module is installed in your OpenAM server. It can be configured as a stand-alone policy or added to an existing authentication chain. When a user attempts to access a protected resource, the request is intercepted and the configured authentication policy is applied. When the LoginTC Authentication module is activated an out of band request is sent to the users mobile app. The request will launch the LoginTC app and gives the user an opportunity to approve or deny the request and then enter their PIN or passcode. The user’s selection is sent back to module which will succeed in the OpenAM authentication chain if the credential was unlocked, otherwise the authentication will fail.
Prefer Reading a PDF?
Download a PDF file with configuration instructions:
Enterprise subscription required
Please contact our sales team for trial access to the LoginTC OpenAM Connector.
Before proceeding, please ensure you have the following:
- LoginTC Cloud Administrator AccountAn administrator account allows you to perform management, maintenance and monitoring of your own LoginTC organization. An organization is where you manage domains, users, add and remove administrators and various other settings.
Sign Up for an administrator account at LoginTC Admin Panel.
- OpenAM InstallationIf you do not already have OpenAM, full installation instructions can be found on ForgeRock’s wiki: OpenAM Installation. This installation guide was written for OpenAM 10.1.0.
- User Data Store, e.g. Active Directory, LDAP Server, OpenDJThis datastore is the same as the one configured for your OpenAM server. Users from your data store will be synchronized with LoginTC Admin. Passwords are not stored in LoginTC Admin, only information about users like name, username and email.
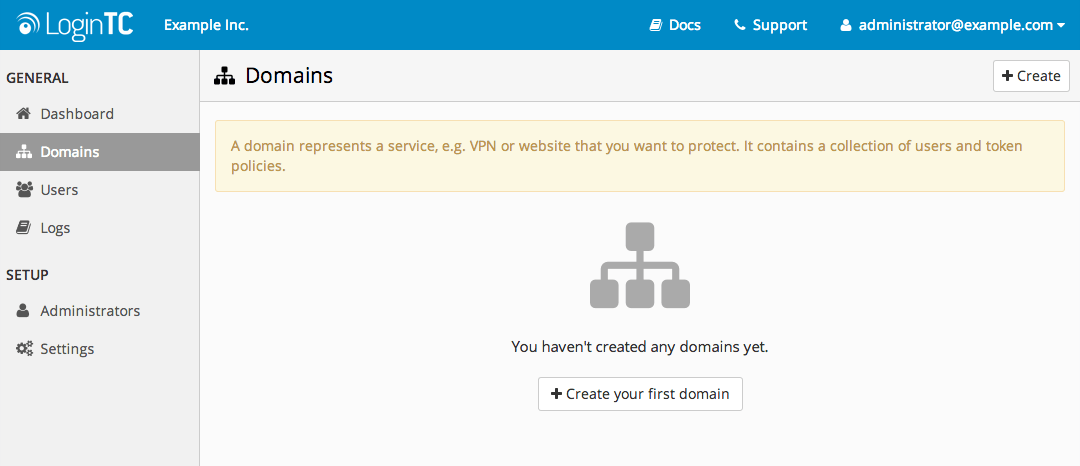
Protecting a corporate network or application is done by creating a new domain in your organization. There are various types of domains specific to what you are trying to protect. In this case, since the protected resource is controlled by OpenAM, use an OpenAM domain.
Steps to create a new OpenAM domain:
- Log in to LoginTC Admin
- Click Domains:
- Click Add Domain:
- Enter a name and optionally pick an icon
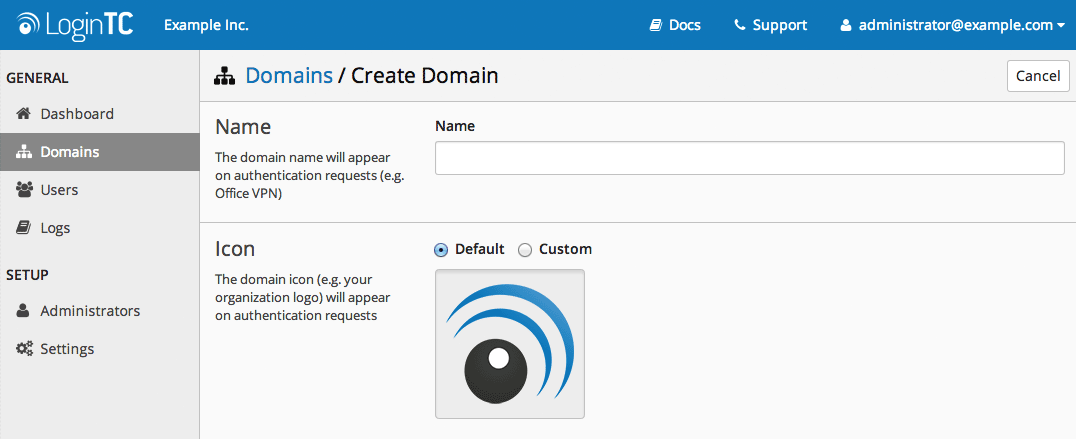
- Scroll down and click Create
Use Default Domain Settings
Domain settings can be modified at any time by navigating to Domains > Your Domain > Settings.
The LoginTC OpenAM Connector contains:
- OpenAM Authentication module
- OpenAM REST datastore client
- Java WAR utility to manage and sync data stores with LoginTC Admin
Before you begin, log into your OpenAM server via ssh:
- Create a LoginTC directory:
mkdir -p /opt/logintc cd /opt/logintc - Copy the latest LoginTC OpenAM Connector to /opt/logintc on your OpenAM server and unzip
unzip logintc-openam-connector-x.x.x.zip
Enterprise subscription required
Please contact our sales team for trial access to the LoginTC OpenAM Connector.
Run Install Script
Before you begin, log into your OpenAM server via ssh:
- Go to LoginTC directory where the connector was downloaded
cd /opt/logintc - Stop your application server, i.e. tomcat
sudo service tomcat stop - Run install command
./install.sh /opt/logintc/logintcauth.jar /usr/share/tomcat/webapps/openam First argument is the path to the `logintcauth.jar` Second argument is the path to the OpenAM exploded WAR - Start your application server, i.e. tomcat
sudo service tomcat start
Enable Authentication Module
- Navigate to your OpenAM installation,
http://www.myopenam.com:8080/openam
- Log in using administrator credentials
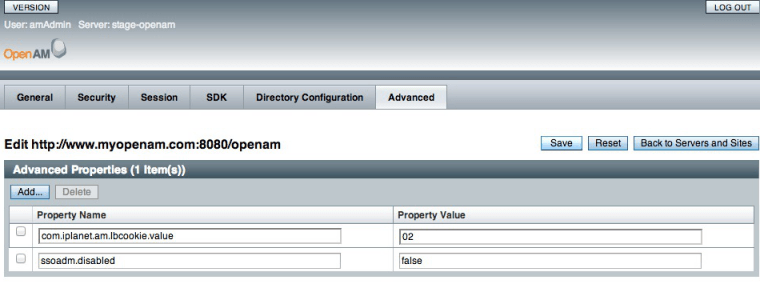
- Enable ssoadm, the configuration of core services:
- Click on Configuration > Servers and Sites tab
- Click on your server under Servers
- Click on the Advanced tab
- Click the Add button and add a new entry:
ssoadm.disabledwith valuefalse - Save
- Restart your application server, i.e. tomcat
sudo service tomcat restart - Navigate to
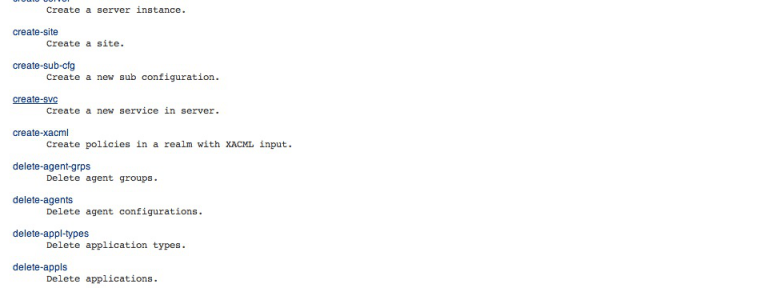
http://www.myopenam.com:8080/openam/ssoadm.jsp - Click create-svc
- Copy the contents from
/opt/logintc/amAuthLoginTCAuth.xmland paste it in the form and click Submit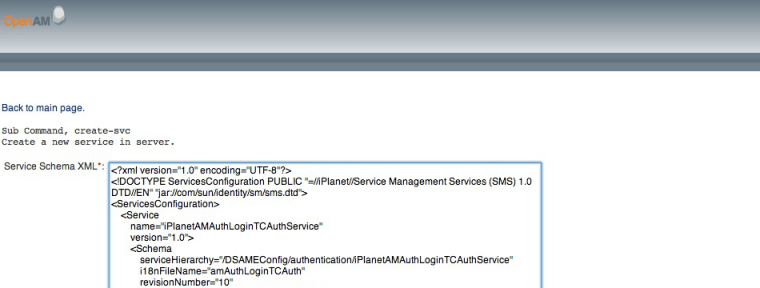
- Navigate to
http://www.myopenam.com:8080/openam/ssoadm.jsp - Click register-auth-module
- Type in
com.cyphercor.logintc.openam.LoginTCAuthand click Submit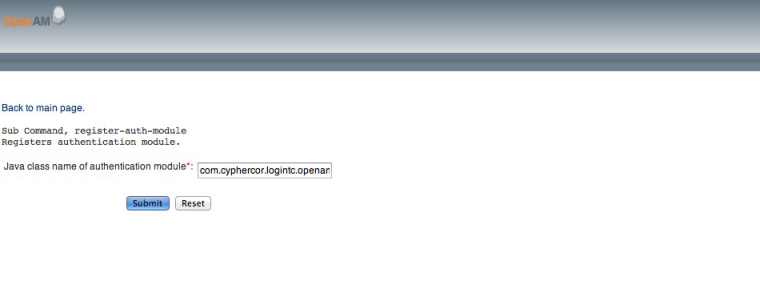
- Restart your application server, i.e. tomcat
sudo service tomcat restart
Create New Module Instance
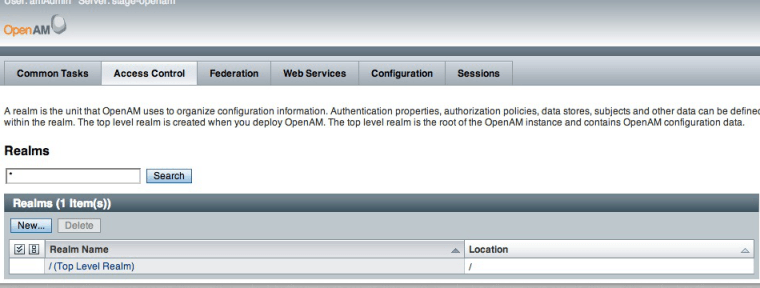
- Navigate to your OpenAM installation,
http://www.myopenam.com:8080/openam - Click Access Control
- Select and click a Realm
- Click Authentication tab
- Create new Module Instance
- Click New under Module Instances
- Enter the name
LoginTC - Select
LoginTCas Type - Click OK
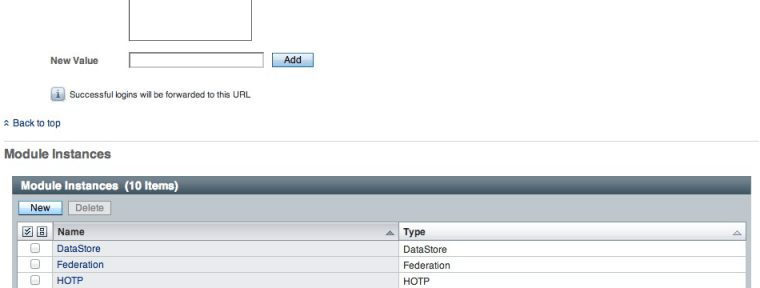
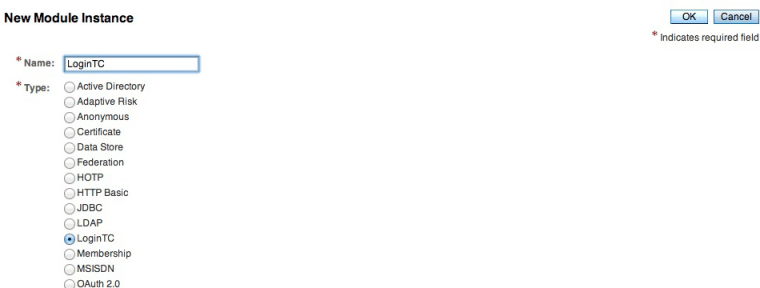
- Click on
LoginTCin the Modules list to configure the module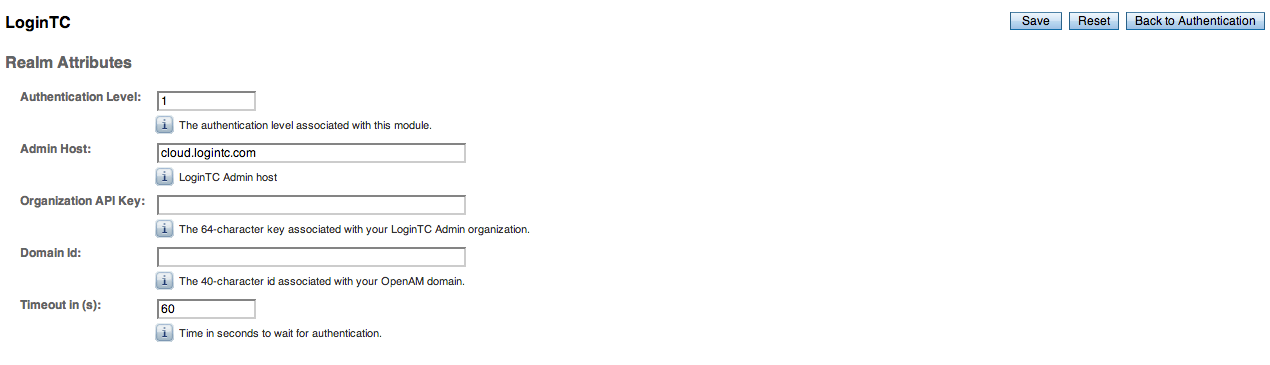
Property Explanation Authentication LevelThe authentication level associated with this module Admin HostLoginTC Admin host Organization API KeyThe 64-character API key associated with your LoginTC Admin organization Domain IDThe 40-character ID associated with your OpenAM domain TimeoutTime in seconds to wait for authentication - When finished click Save
- Restart tomcat on this server
sudo service tomcat restart
One-way user synchronization of users from your OpenAM datastore directory to your OpenAM domain in LoginTC Admin is done by running logintc-sync.
logintc-sync will connect via REST to your OpenAM installation and sync users according to settings in users.cfg and fetch users from your directory using the filter query. If you wish to keep your user directory in sync with the users in your OpenAM domain in LoginTC Cloud, you may periodically run this command (without the --dry-run flag).
Go to conf in the installation directory:
cd /opt/logintc/confCopy the sample file as a template for your configuration file:
cp sample-users.cfg users.cfgOpen the file to modify its contents:
vi users.cfg

            # openam
            openam.protocol=http
            openam.host=www.myopenam.com
            openam.port=8080
            openam.path=/openam
            openam.admin.username=amadmin
            openam.admin.password=password
            openam.realm=/
            openam.attr.username=uid
            openam.attr.name=cn
            openam.attr.email=mail
            openam.filter.objectclass=person

            # logintc
            logintc.apikey=
            logintc.domainid=
OpenAM configuration values:
| Property | Explanation | Examples |
|---|---|---|
openam.protocol |
The protocol of your OpenAM server | http or https |
openam.host |
The host of your OpenAM server | www.myopenam.com |
openam.port |
The port of your OpenAM server | 8080 |
openam.path |
The path to your OpenAM installation | /openam |
openam.admin.username |
The username of a user with admin privileges in the realm | amadmin |
openam.admin.password |
The password of the above account | password |
openam.realm |
The realm in which the module is installed | / |
openam.attr.username |
The attribute containing the user’s username | uid |
openam.attr.name |
The attribute containing the user’s real name | cn |
openam.attr.email |
The attribute containing the user’s email | |
openam.filter.objectclass (optional) |
The object class of the users | person |
LoginTC configuration values:
| Property | Explanation |
|---|---|
logintc.apikey |
The 64-character key associated with your LoginTC Admin organization. |
logintc.domainid |
The 40-character id associated with your OpenAM domain. |
The API key is found on the LoginTC Admin Settings page. The Domain ID is found on your domain settings page.
Example:
$ cd /opt/logintc/bin
            $ sudo ./logintc-sync /opt/logintc/conf/users.cfg
Output:
Processing /opt/logintc/users.cfg...
            Querying OpenAM Rest service [http://www.myopenam.com:8080]
            Found 2 users
            +-------+----------+----------+----------------------+
            | Realm | Username | Name     | Email                |
            +-------+----------+----------+----------------------+
            | /     | john.doe | John Doe | john.doe@example.com |
            | /     | jane.doe | Jane Doe | jane.doe@example.com |
            +-------+----------+----------+----------------------+
            Synchronizing 2 users...
            Done.
Check that your users were added to your domain by viewing them in LoginTC Admin Panel.
There are several other options for managing your users within LoginTC:
- Individual users can be added manually in LoginTC Admin Panel
- Bulk operations in LoginTC Admin Panel
- Programmatically manage user lifecycle with the REST API
- One-way user synchronization of users to LoginTC Admin is performed using User Sync Tool.
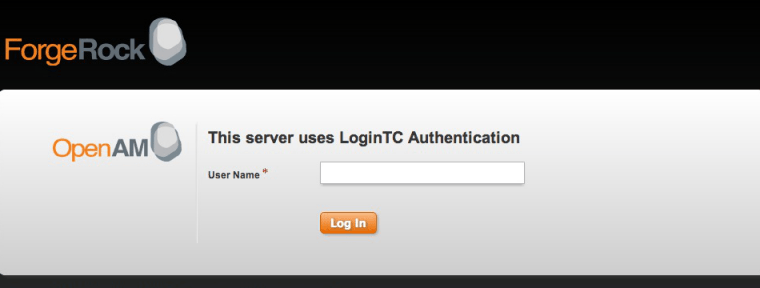
Once you have synchronized some users you can test the LoginTC module.
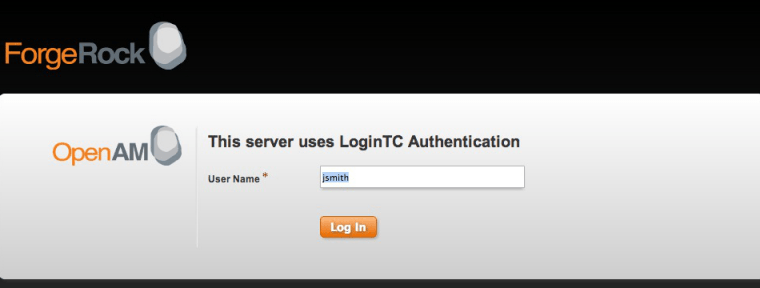
Navigate to www.myopenam.com:8080/openam/UI/Login?module=LoginTC
Enter the test user’s username. You should now receive an authentication request on your mobile device. After authenticating you will be shown OpenAM user data.
Now that everything is tested you will want to create or modify an existing authentication chain to include the LoginTC.
- Navigate to your OpenAM installation,
http://www.myopenam.com:8080/openam - Click Access Control
- Select and click a Realm
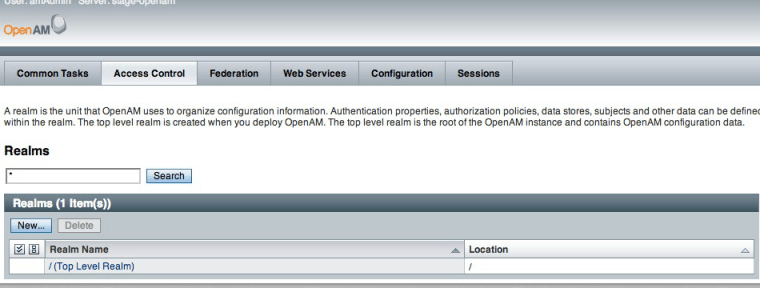
- Click Authentication tab
- Create new Authentication Chaining
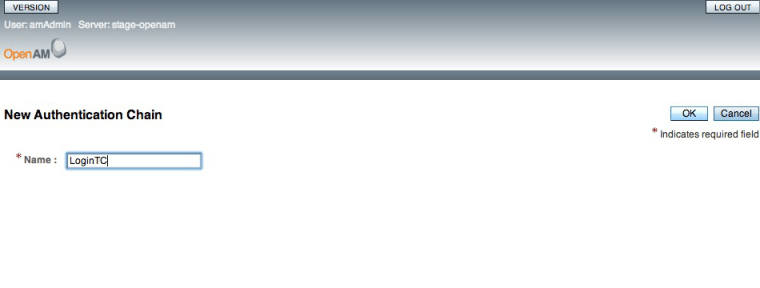
- Click New under Authentication Chaining
- Enter
LoginTCand click OK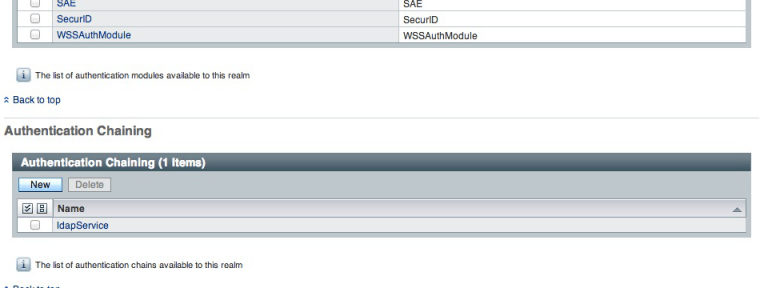
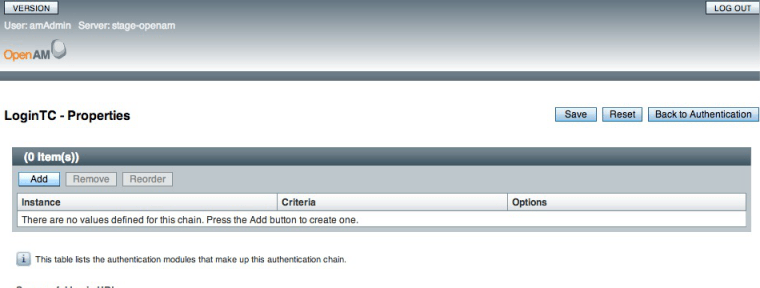
- Configure the new Authentication Chain
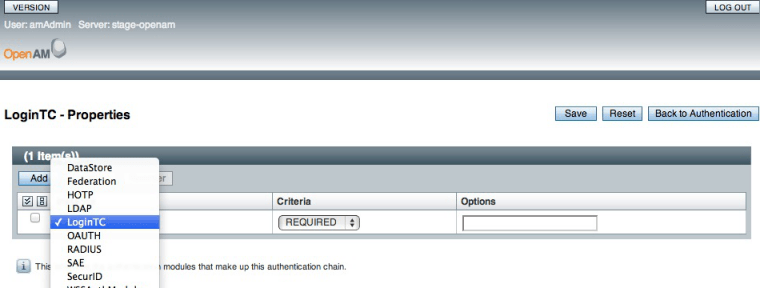
- Click Add
- Selet LoginTC
- Set Criteria to
REQUIRED - Click Save
- Click Back to Authentication
- Restart your application server, i.e. tomcat
sudo service tomcat restart - Test the new Authentication Chain
- Navigate to
www.myopenam.com:8080/openam/UI/Login?service=LoginTC - Enter the test user’s username. You should now receive an authentication request on your mobile device. After authenticating you will be shown OpenAM user data.
- Navigate to
You can add other authentication modules to make chains. For example the following will first prompt for a username and password and then request a 2nd factor using the LoginTC:
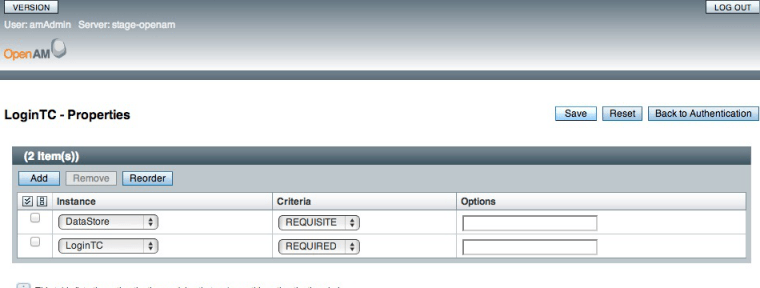
Sample flow:

Once users have been synched to your OpenAM domain and you have tested your setup you can begin the process of user provisioning.
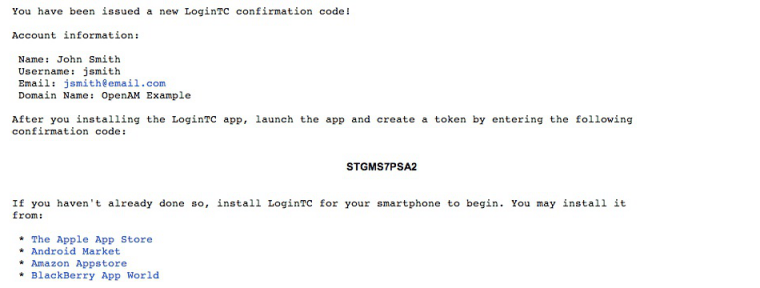
As seen in the Testing Installation section, users are issued a confirmation code which they use to load a new token on their mobile app. The Issue Token button will send an email to your user with full instructions on how to load a token. Sample email: