The LoginTC RADIUS Connector is a complete two-factor authentication virtual machine packaged to run within your corporate network. The LoginTC RADIUS Connector enables the WatchGuard XTM and Firebox VPN (e.g. Mobile VPN with SSL or IPSec or IKEv2 or L2TP) to use LoginTC for the most secure two-factor authentication. For instructions using direct authentication then you may be interested in: Two factor authentication for WatchGuard XTM and Firebox IPSec Alternative.
User ExperienceAfter entering the username and password into the Mobile VPN client, the user is presented with an Authentication Message. The user may enter ‘1’ to receive a push notification to their device to approve or enter a valid One-Time Password (OTP).

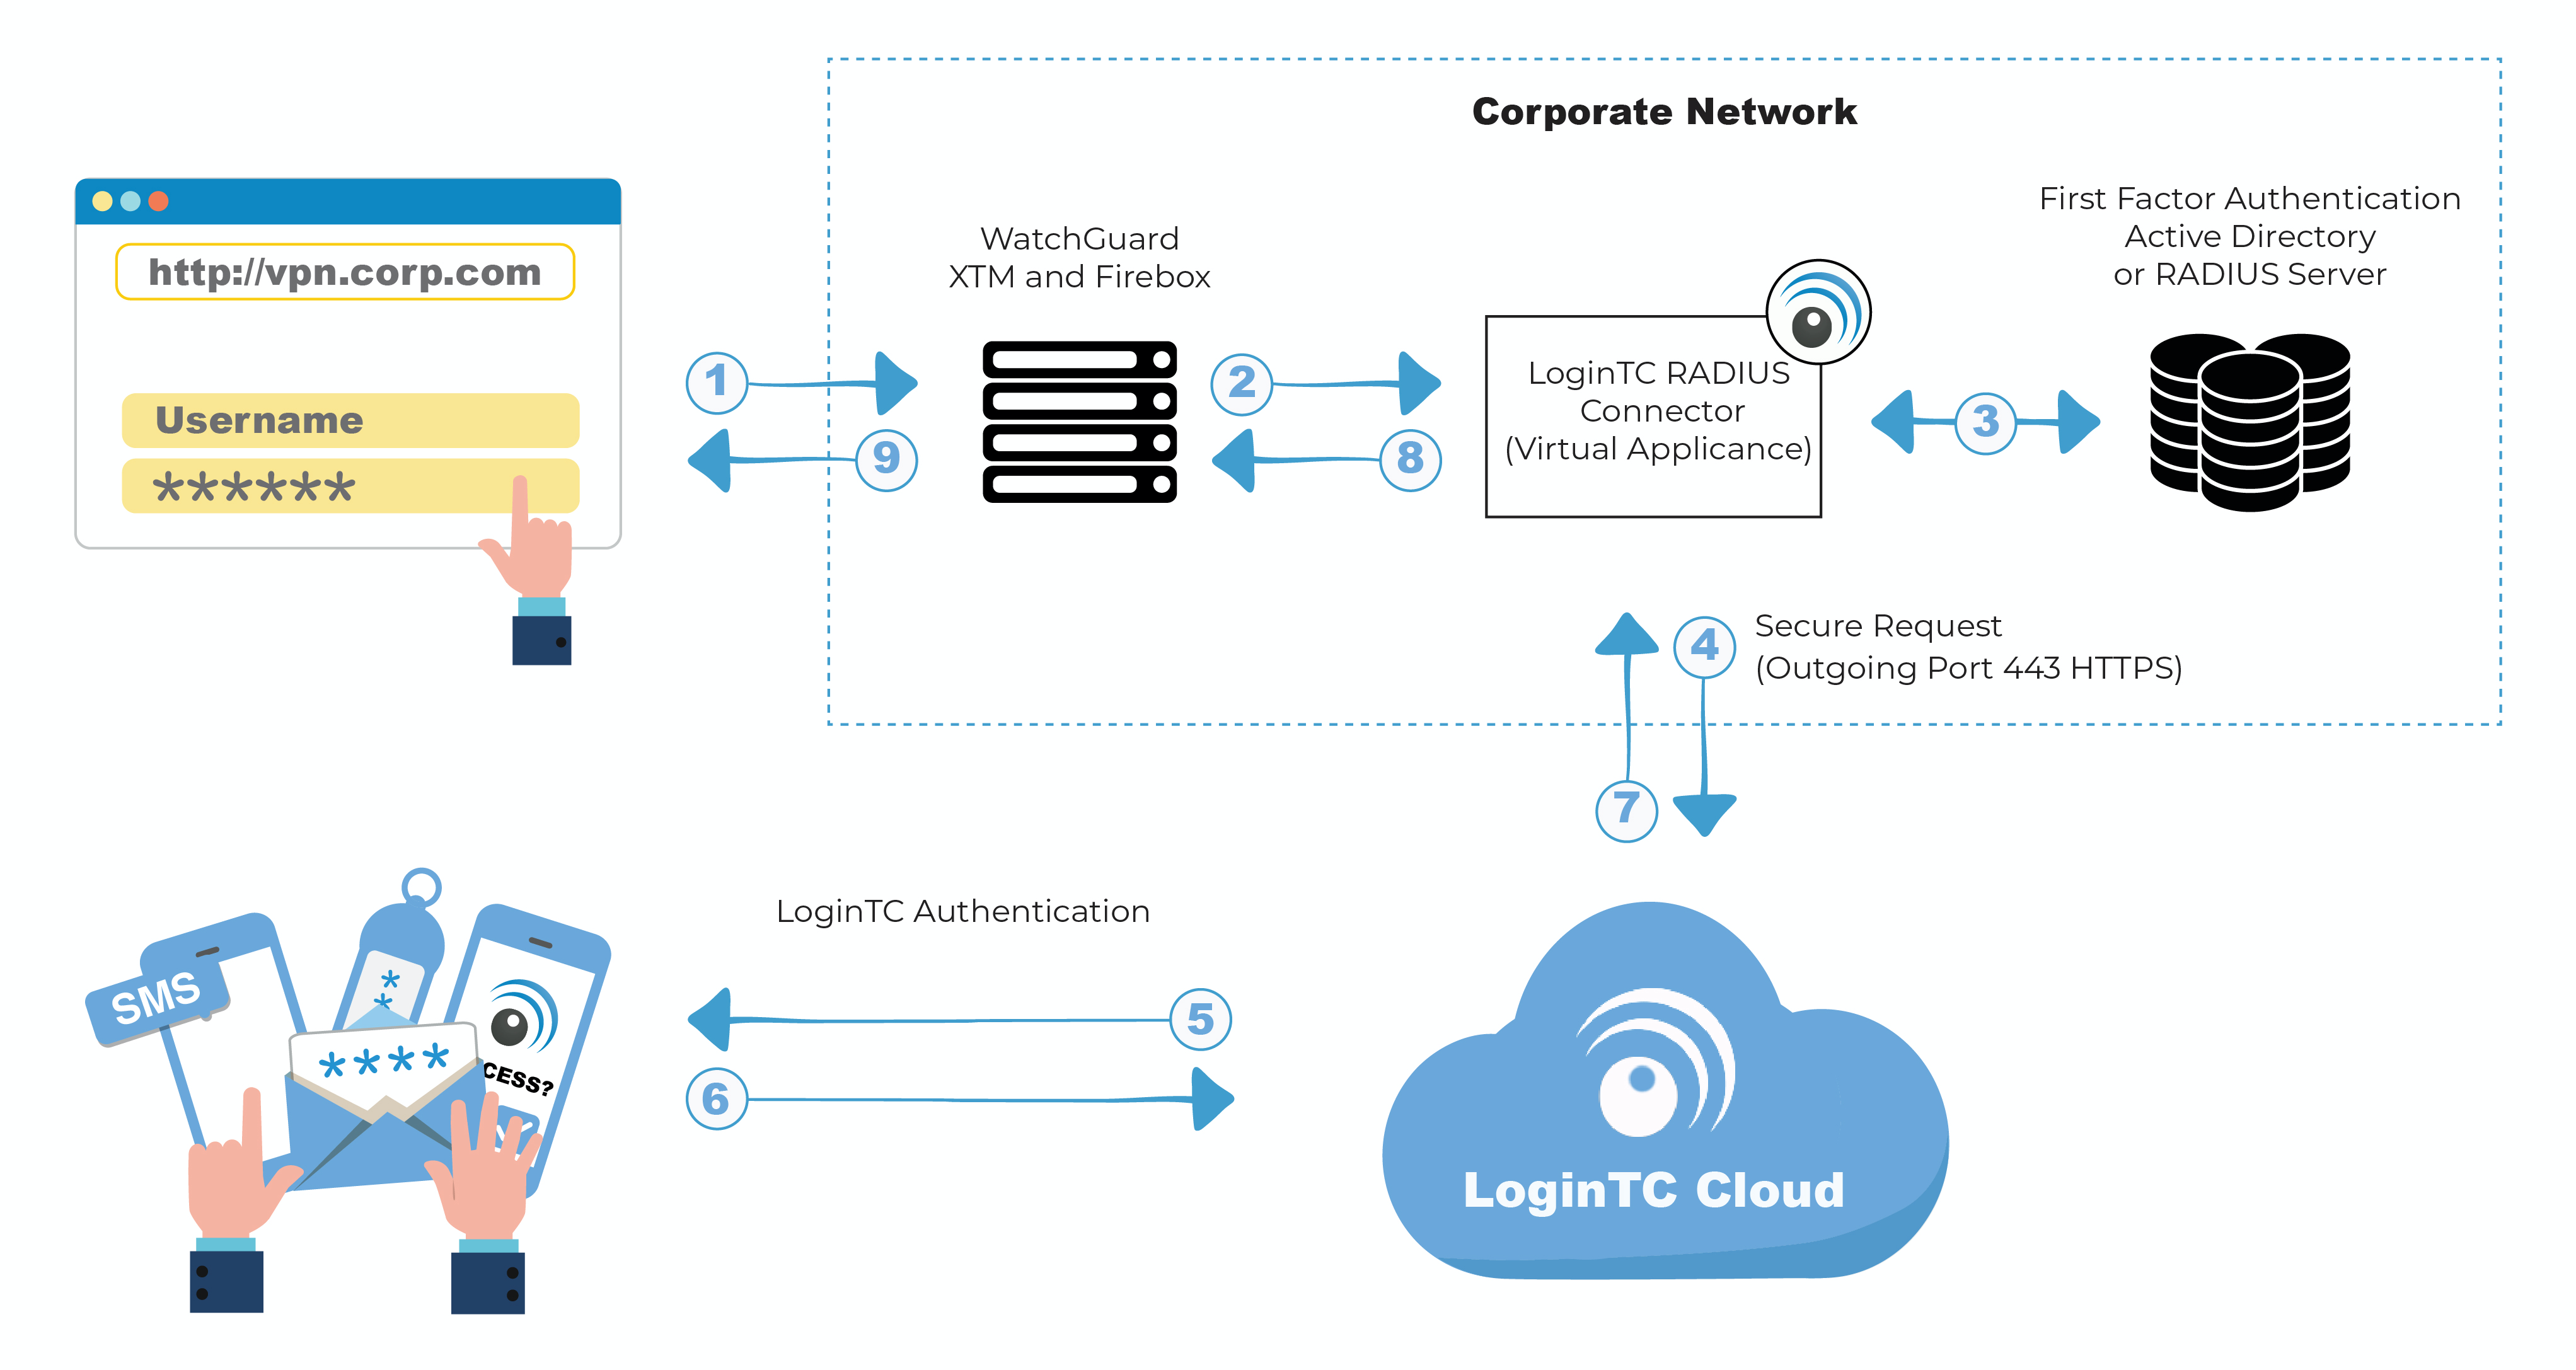
Authentication Flow
- A user attempts access with their existing WatchGuard client with username / password
- A RADIUS authentication request is sent to the LoginTC RADIUS Connector
- The username / password is verified against an existing first factor directory (LDAP, Active Directory or RADIUS)
- An authentication request is made to LoginTC Cloud Services
- Secure push notification request sent to the user’s mobile or desktop device
- User response (approval or denial of request) sent to LoginTC Cloud Services
- The LoginTC RADIUS Connector polls until the user responds or a timeout is reached
- RADIUS Access-Accept sent back to WatchGuard
- User is granted access to WatchGuard
Prefer Reading a PDF?
Download a PDF file with configuration instructions for your chosen VPN protocol:
- Get the WatchGuard XTM and Firebox VPN with LoginTC Two Factor Authentication for Mobile VPN with SSL
- Get the WatchGuard XTM and Firebox VPN with LoginTC Two Factor Authentication for Mobile VPN with SSL Alternative
- Get the WatchGuard XTM and Firebox VPN with LoginTC Two Factor Authentication for Mobile VPN with IPsec
- Get the WatchGuard XTM and Firebox VPN with LoginTC Two Factor Authentication for Mobile VPN with IPsec Alternative
WatchGuard appliance compatibility:
- WatchGuard Firebox T10 Series
- WatchGuard XTM 2 Series
- WatchGuard XTM 3 Series
- WatchGuard XTM 5 Series
- WatchGuard Unified Threat Management (UTM)
- WatchGuard Next-Generation Firewall (NGFW)
- WatchGuard appliance supporting RADIUS authentication
Appliance not listed?
We probably support it. Contact us if you have any questions.
Compatibility Guide
WatchGuard XTM, Firebox and any other appliance which have configurable RADIUS authentication supported.
Before proceeding, please ensure you have the following:
- LoginTC Admin Panel account
- Computer virtualization software such as VMware ESXi, VirtualBox, or Hyper-V
- Virtual Machine requirements:
- 1 vCPU
- 2 GiB RAM
- 8 GB disk space
Start by creating a LoginTC Application for your deployment. An Application represents a service (e.g. An application is a service (e.g., VPN or web application) that you want to protect. e) that you want to protect with LoginTC.
Create a LoginTC Application in LoginTC Admin Panel, follow Create Application Steps.
If you have already created a LoginTC Application for your deployment, then you may skip this section and proceed to Installation.
Installation- Download the latest LoginTC RADIUS Connector:
- Import the virtual appliance your computer virtualization software
- Ensure that LoginTC RADIUS CONNECTOR has a virtual network card
- Start the virtual appliance
- You will be with a console prompt:
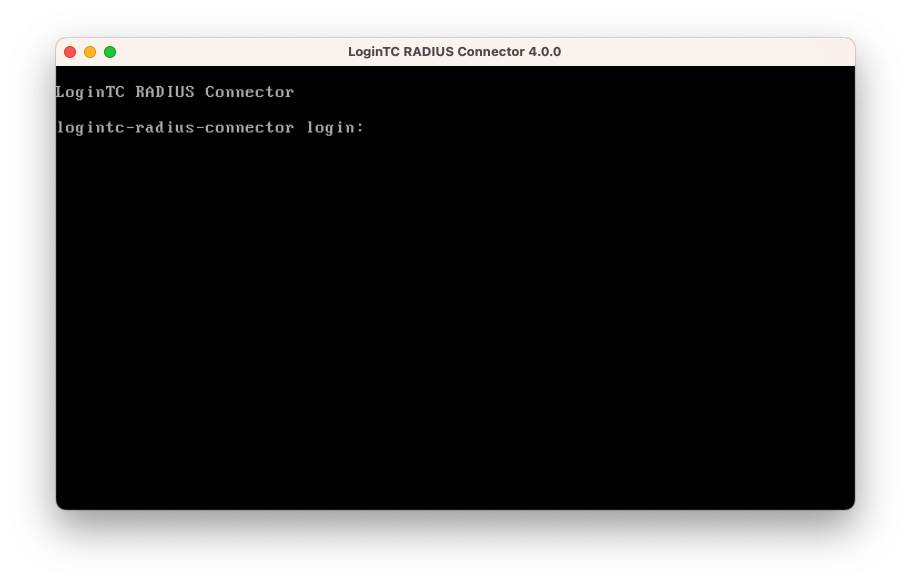
- Login using the username logintc-user and default password logintcradius:
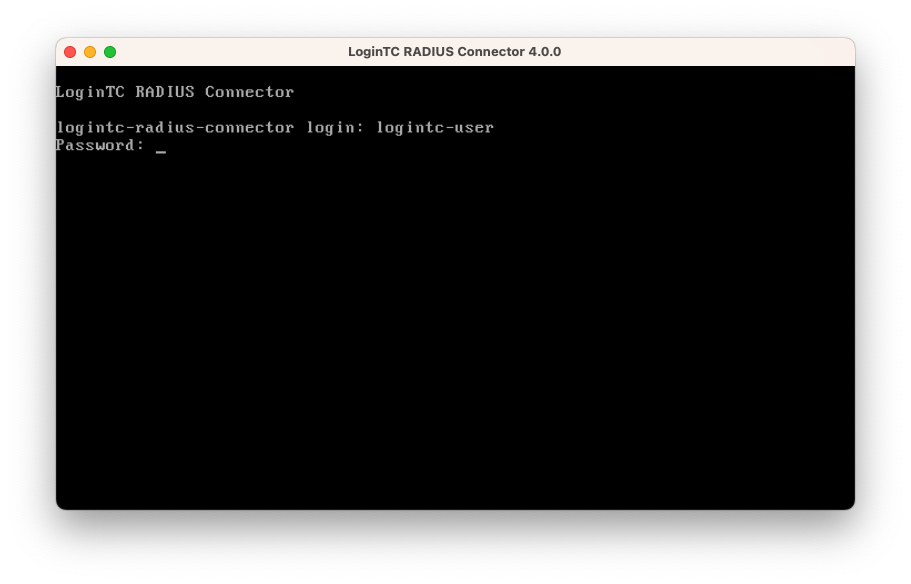
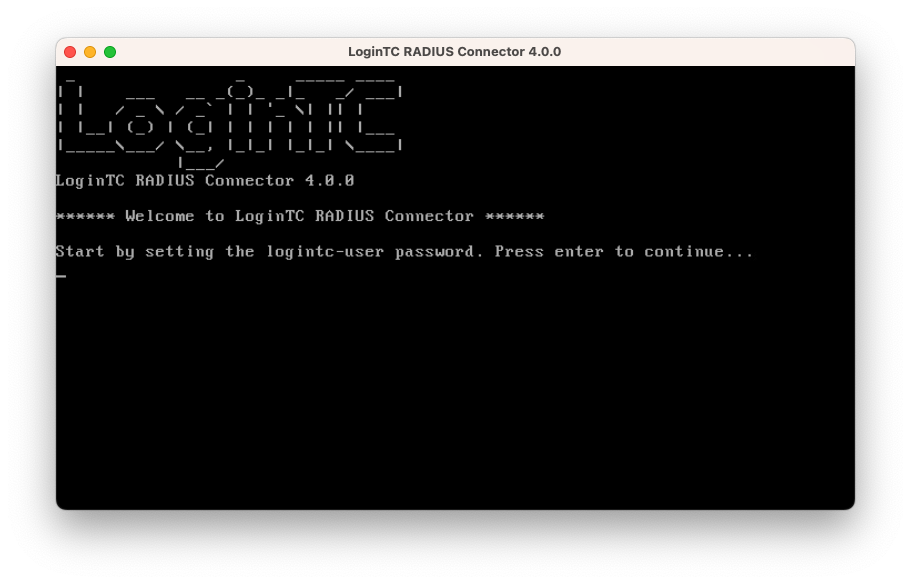
- Once logged in type setup:

- Follow the on-screen prompt to setup a new password for logintc-user:
- By default the appliance network is not configured. Manually configure the network by typing 1 and hit enter:
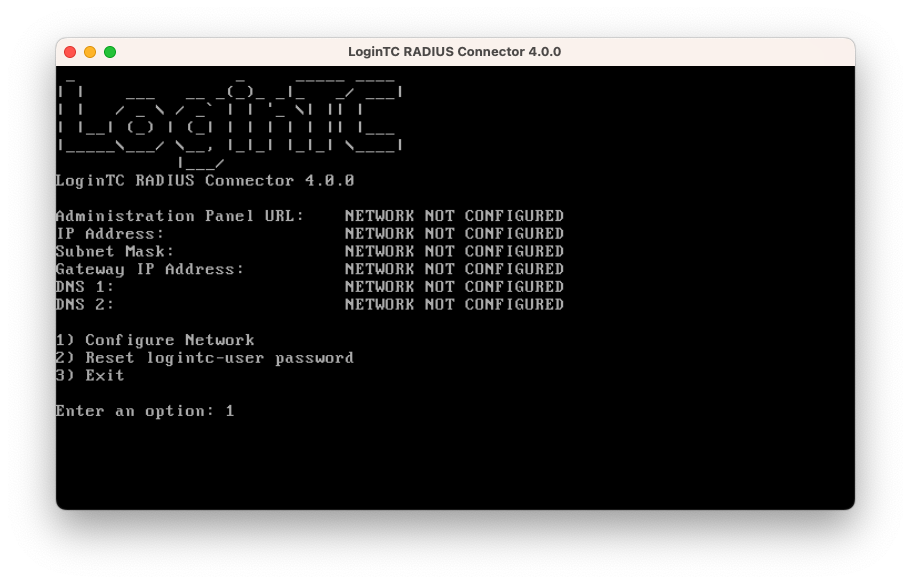
- Follow the on-screen prompts to setup the network. When done, type 1 and enter to confirm the settings:
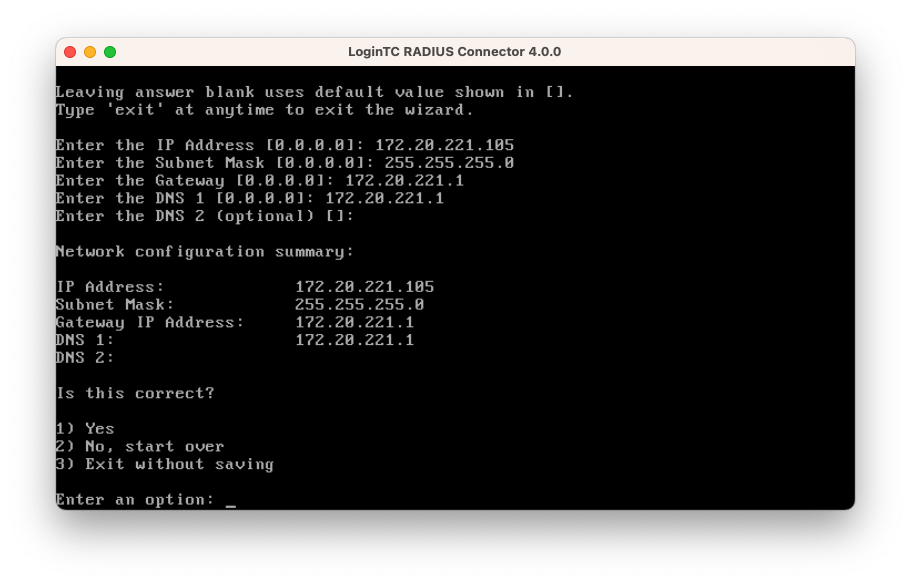
- You will be presented with the network configuration which includes the URL to connect to the appliance from a web browser (example https://172.20.221.105:8443):
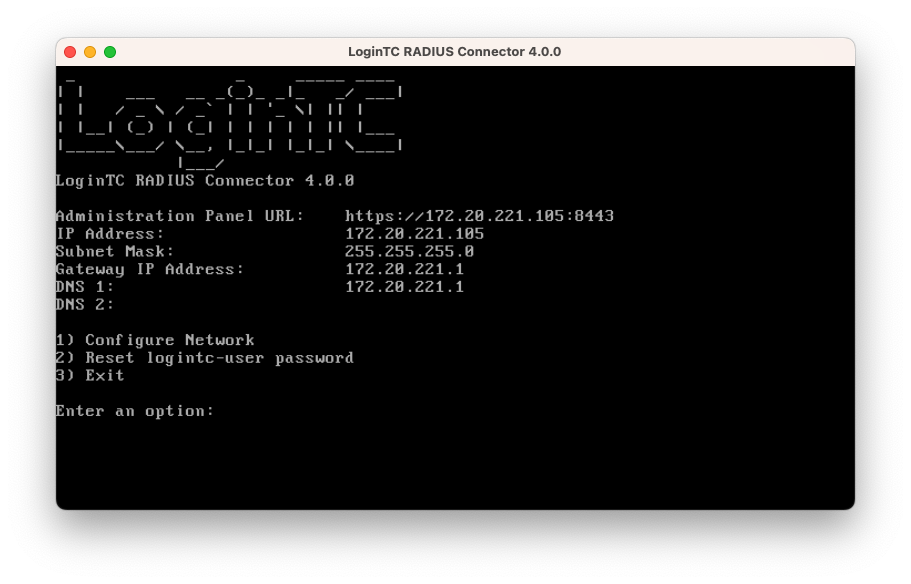
- Navigate to the URL shown in the console dashboard (example:
https://172.20.221.105:8443):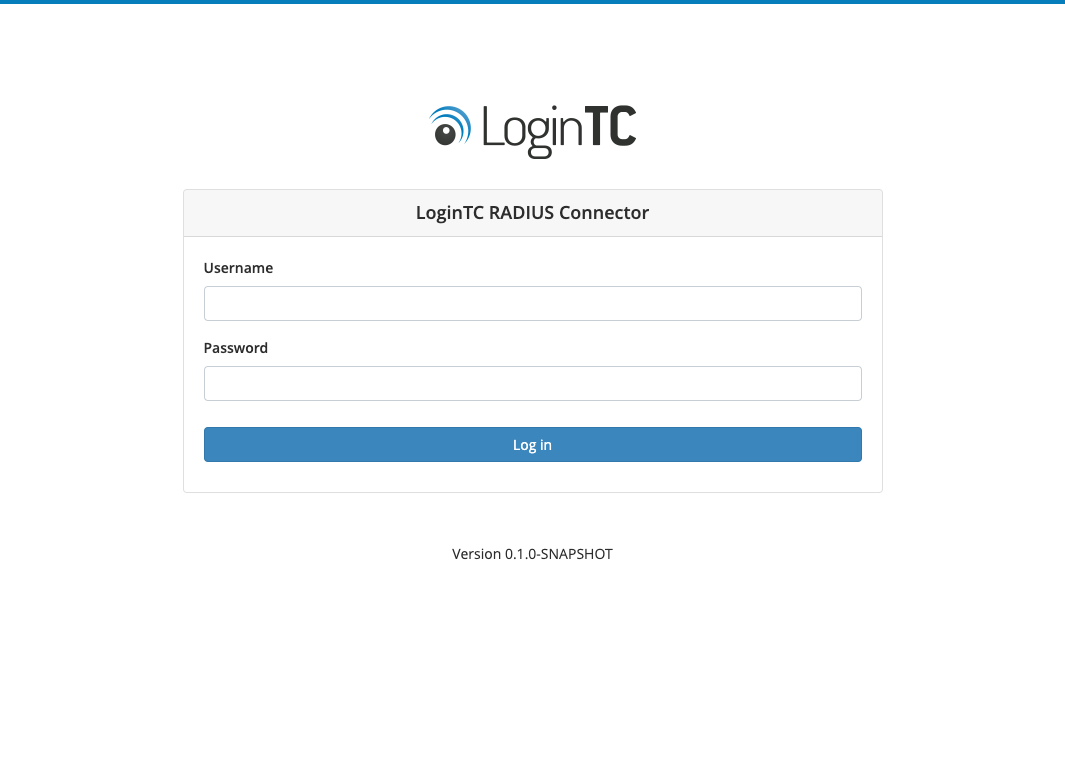
- Login using the username logintc-user and the password that was set in the initial setup:

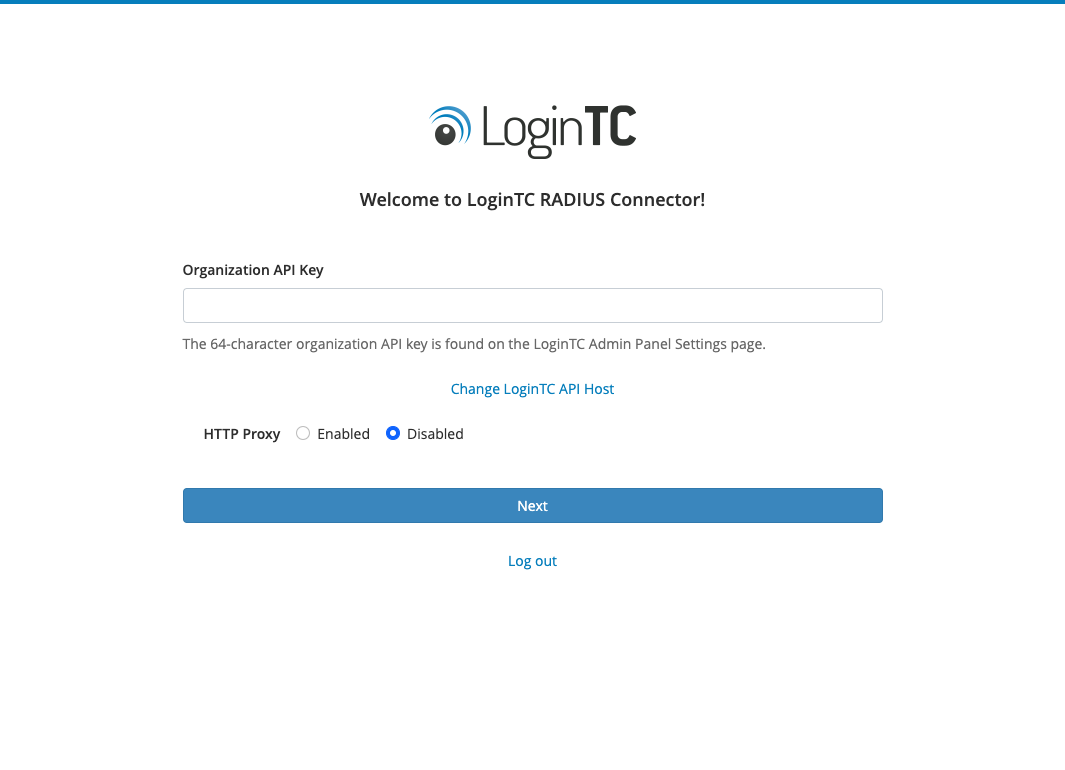
- Link to your existing LoginTC organization. The 64-character Organization API Key is found on the LoginTC Admin Panel under Settings >page API >page Click to view, also see Organization API Key:
- Confirm the LoginTC organization name and click Continue to LoginTC RADIUS Connector:

- If you have an existing LoginTC RADIUS Connector your wish to import configurations then click Yes, import configurations from an existing LoginTC RADIUS Connector, otherwise click No, continue to the adminsitration panel:

NOTE
These instructions assume a new environment. For a complete 2.X / 3.X to 4.X upgrade guide: LoginTC RADIUS Connector Upgrade Guide - Now you are ready to use the LoginTC RADIUS Connector:
| Port | Protocol | Purpose |
|---|---|---|
| 1812 | UDP | RADIUS authentication |
| 443 | TCP | API traffic |
| 8443 | TCP | Web interface |
logintc-user is used for SSH and web access. The default password is logintcradius. You will be asked to change the default password on first boot of the appliance.
Endpoints describe how the appliance will authenticate your RADIUS-speaking device with an optional first factor and LoginTC as a second factor. Each endpoint has 4 Sections:
1. LoginTC SettingsThis section describes how the appliance itself authenticates against LoginTC Admin Panel with your LoginTC Application. Only users that are part of your organization and added to the domain configured will be able to authenticate.
2. User DirectoryThis section describes how the appliance will conduct an optional first factor. Either against an existing LDAP, Active Directory or RADIUS server. If no first factor is selected, then only LoginTC will be used for authentication.
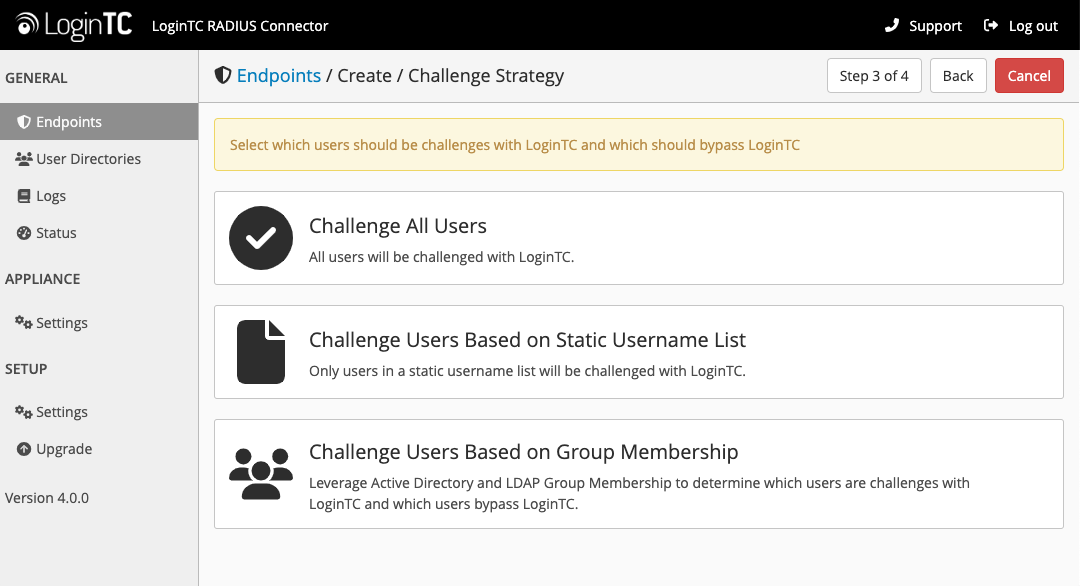
3. Challenge Strategy / PassthroughThis section describes whether the appliance will perform a LoginTC challenge for an authenticating user. The default is to challenge all users. However with either a static list or Active Directory / LDAP Group you can control whom gets challenged to facilitate seamless testing and rollout.
4. Client SettingsThis section describes which RADIUS-speaking device will be connecting to the appliance and whether to encrypt API Key, password and secret parameters.
The web interface makes setting up an endpoint simple and straightforward. Each section has a Test feature, which validates each input value and reports all potential errors. Section specific validation simplifies troubleshooting and gets your infrastructure protected correctly faster.
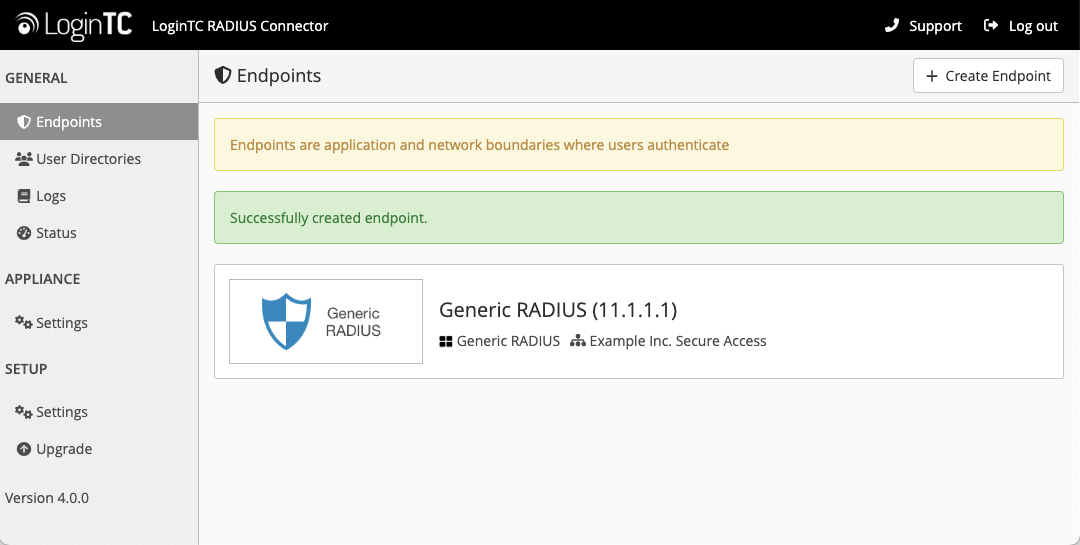
First Endpoint
Close the console and navigate to your appliance web interface URL. Use username logintc-user and the password you set upon initial launch of the appliance. You will now configure the LoginTC RADIUS Connector.
Create a new endpoint file by clicking + Create your first endpoint:
LoginTC Settings
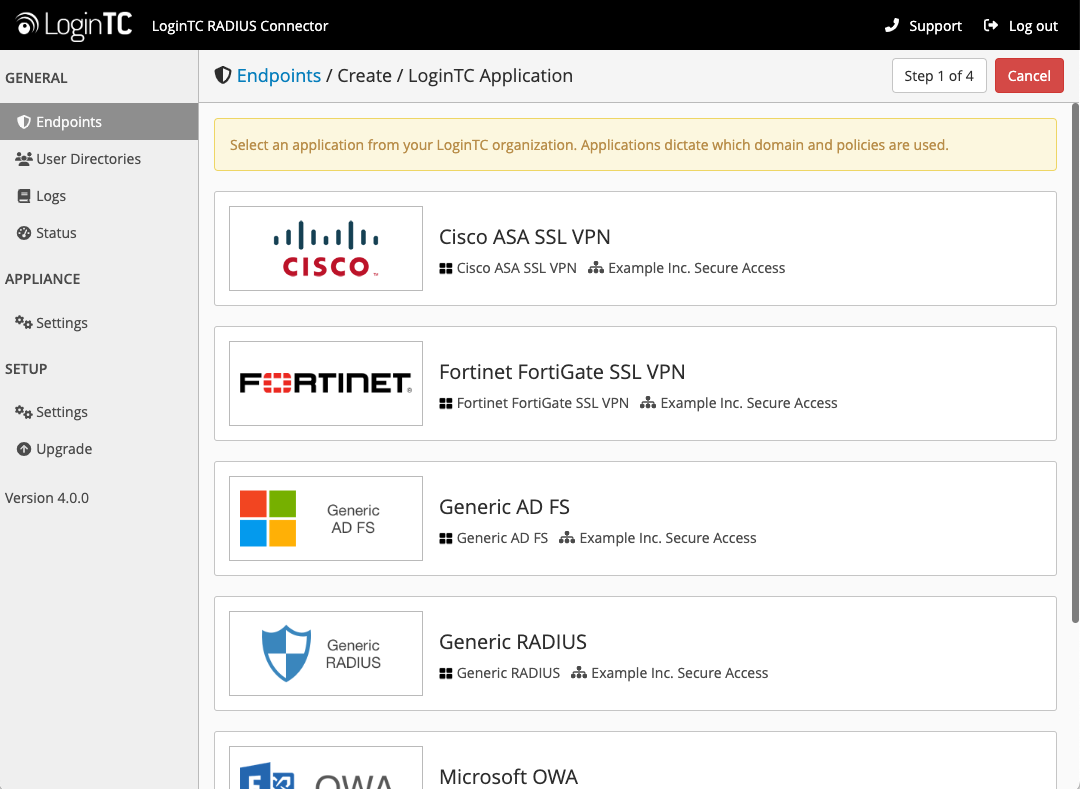
A list of available Applications will be displayed from your LoginTC organization. Select which LoginTC Application to use:
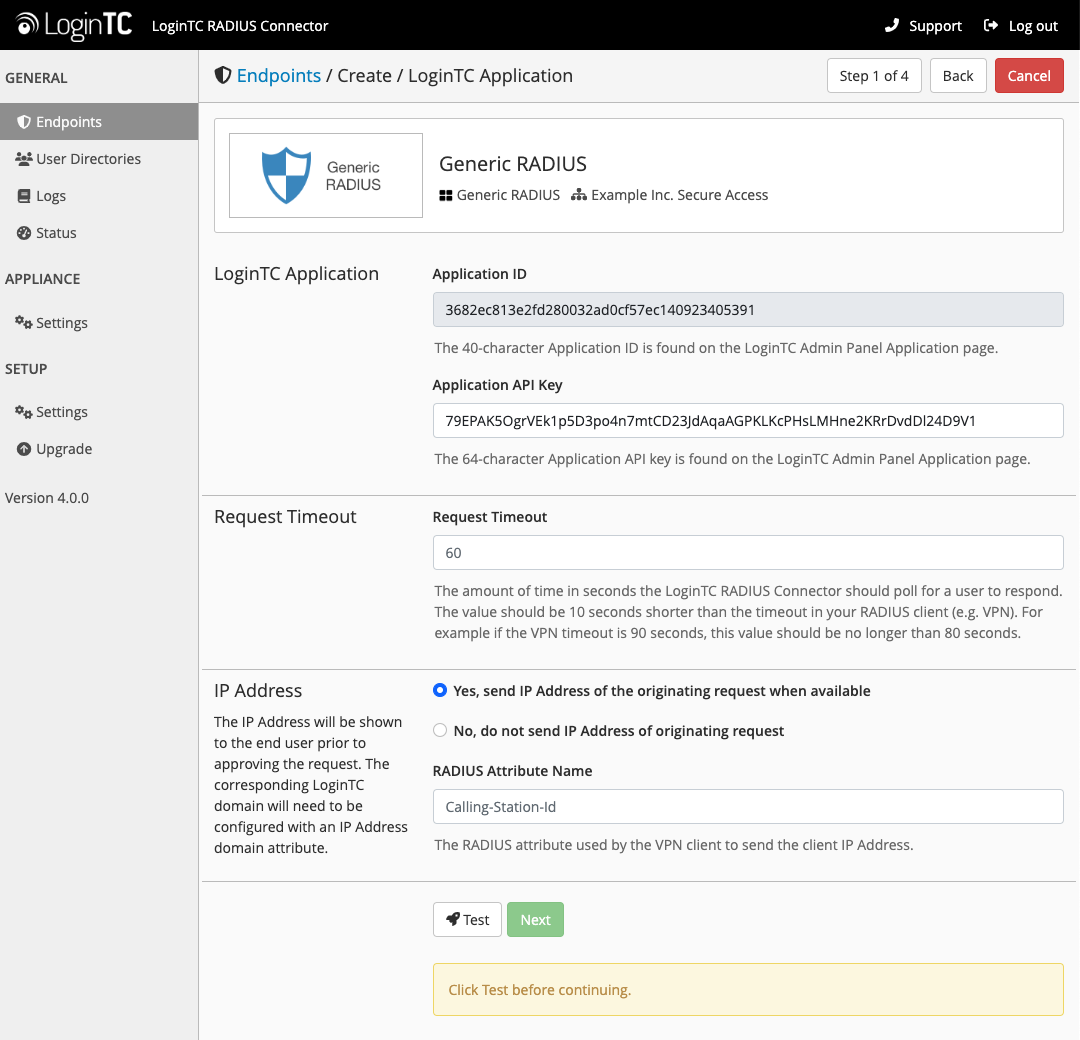
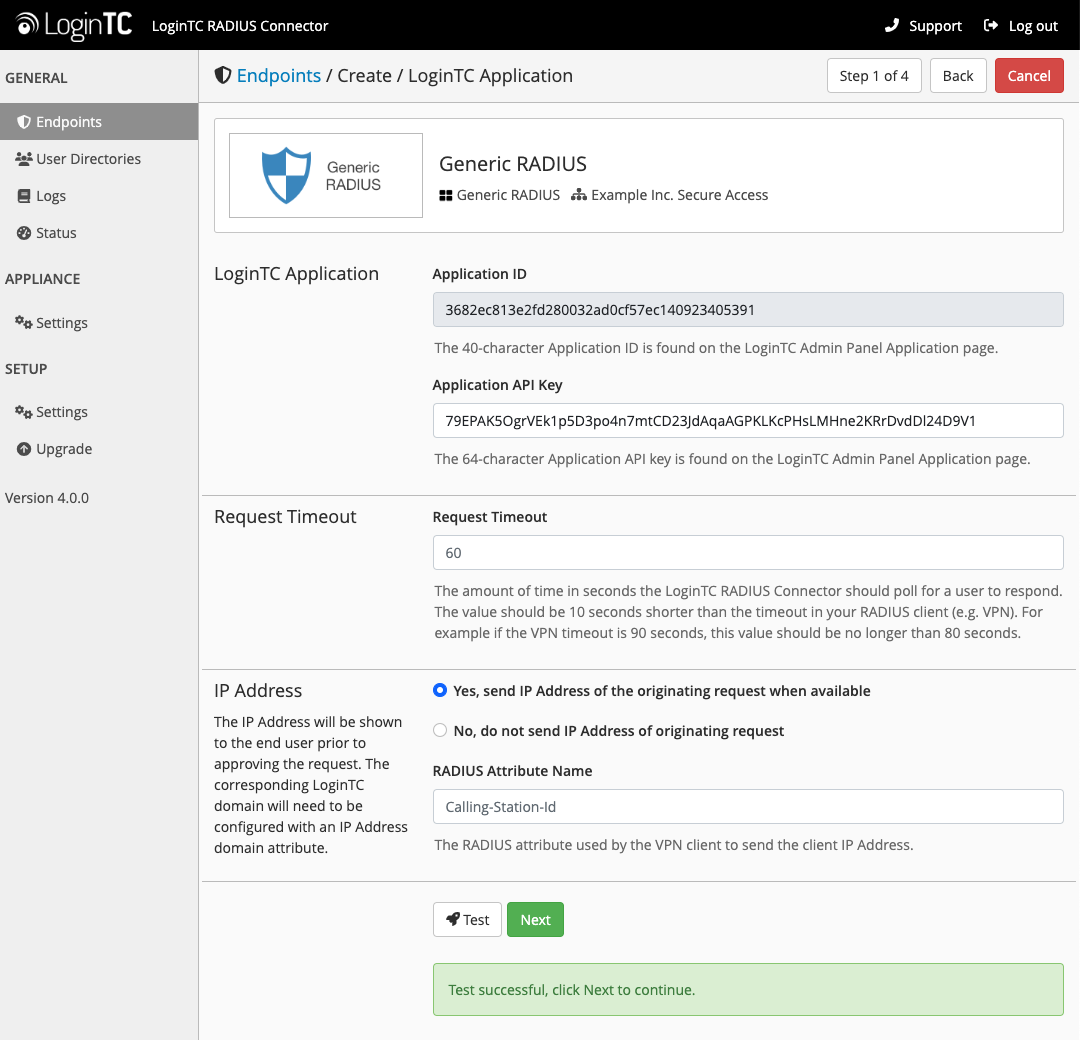
Configure the application:
Configuration values:
| Property | Explanation |
|---|---|
Application ID |
The 40-character Application ID, retrieve Application ID |
Application API Key |
The 64-character Application API Key, retrieve Application API Key |
Request Timeout |
Number of seconds that the RADIUS connector will wait for |
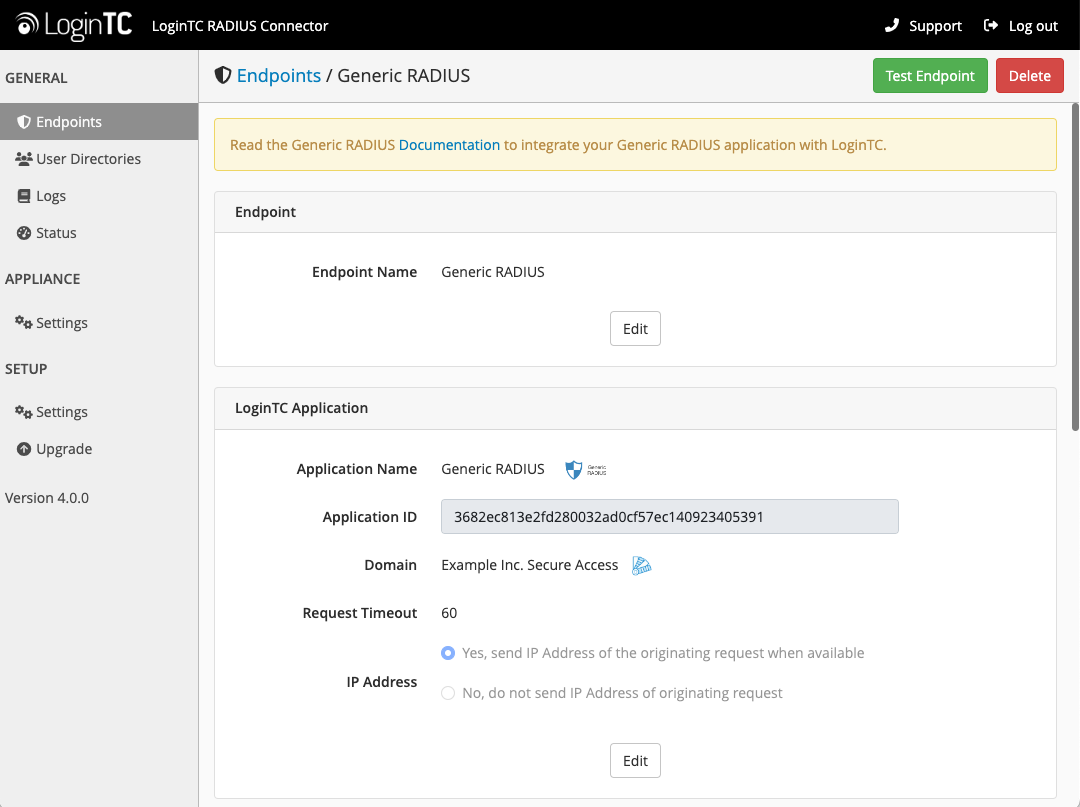
The Application ID and Application API Key are found on the LoginTC Admin Panel.
Request Timeout
Make a note of what you set the Request Timeout to as you will need to use a larger timeout value in your RADIUS client. We recommend setting the Request Timeout value to 60 seconds in the LoginTC RADIUS Connector and setting the RADIUS authentication server timeout to 70 seconds in RADIUS Client. For more information see: Recommended settings for an optimal user experience for VPN access
Click Test to validate the values and then click Next:
User Directory
Configure the user directory to be used for first authentication factor in conjunction with LoginTC. You may use Active Directory / LDAP or an existing RADIUS server. You may also opt not to use a first factor, in which case LoginTC will be the only authentication factor.
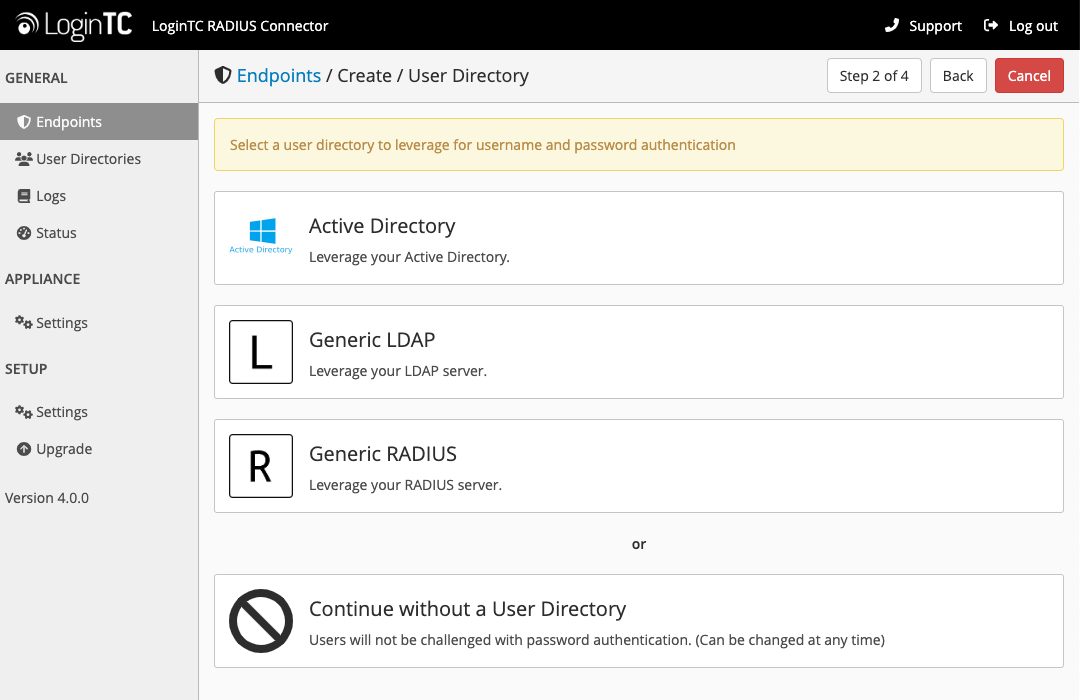
Active Directory / Generic LDAP Option
Select Active Directory if you have an AD Server. For all other LDAP-speaking directory services, such as OpenDJ or OpenLDAP, select Generic LDAP:
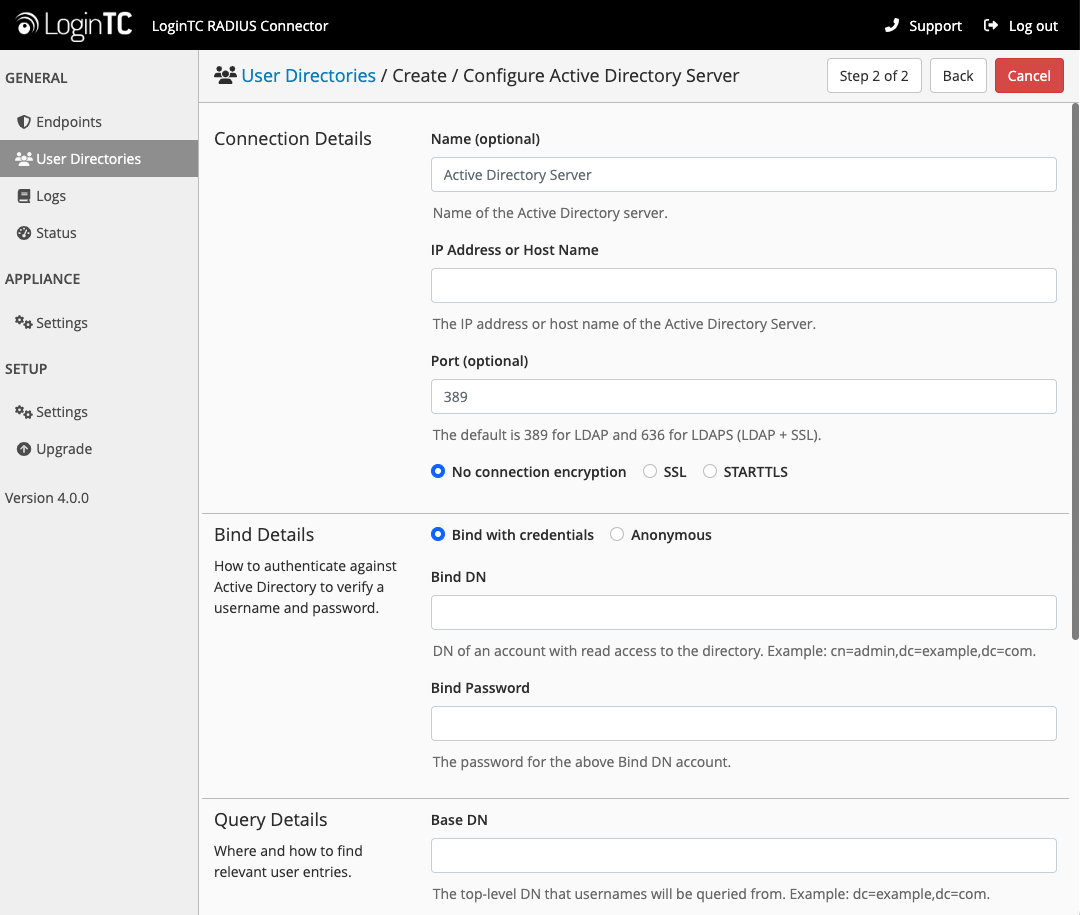
Configuration values:
| Property | Explanation | Examples |
|---|---|---|
host |
Host or IP address of the LDAP server | ldap.example.com or 192.168.1.42 |
port (optional) |
Port if LDAP server uses non-standard (i.e., 389/636) |
4000 |
bind_dn |
DN of a user with read access to the directory | cn=admin,dc=example,dc=com |
bind_password |
The password for the above bind_dn account | password |
base_dn |
The top-level DN that you wish to query from | dc=example,dc=com |
attr_username |
The attribute containing the user’s username | sAMAccountName or uid |
attr_name |
The attribute containing the user’s real name | displayName or cn |
attr_email |
The attribute containing the user’s email address | mail or email |
LDAP Group (optional) |
The name of the LDAP group to be sent back to the authenticating server. | SSLVPN-Users |
encryption (optional) |
Encryption mechanism | ssl or startTLS |
cacert (optional) |
CA certificate file (PEM format) | /opt/logintc/cacert.pem |
Click Test to validate the values and then click Next.
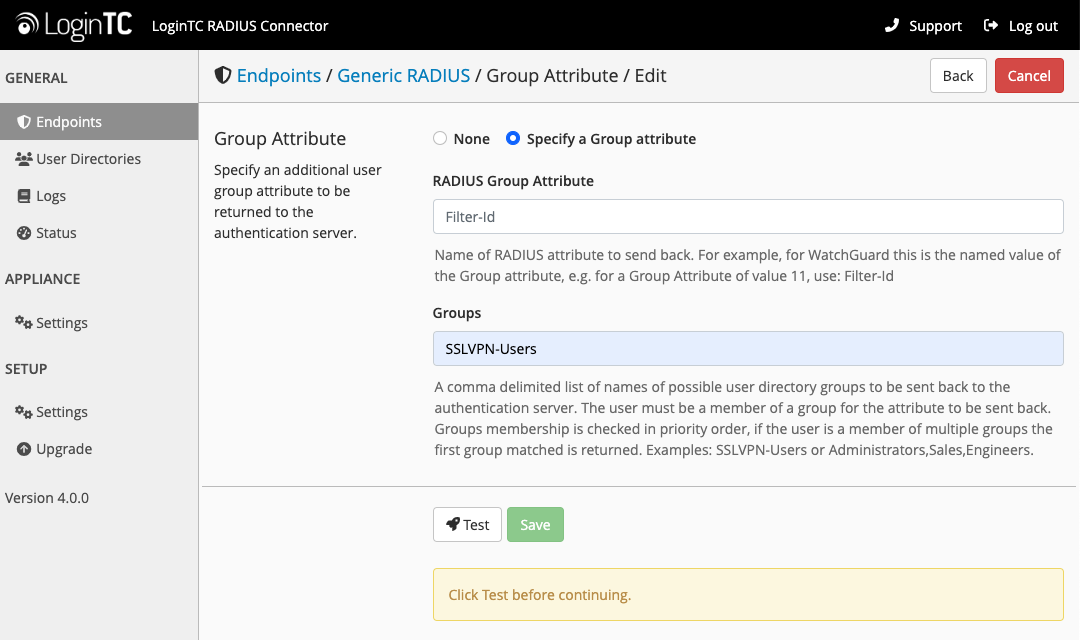
Group Attribute and Access Control
In order to use Mobile VPN with SSL or IPSec, you must properly configure the Group Attribute in your RADIUS Connector. WatchGuard devices use the Group Attribute value to set the attribute that carries the User Group information. This information is used for access control.
To match WatchGuard’s default values, set RADIUS Group Attribute to Filter-Id and LDAP Group to SSLVPN-Users
LDAP Group / AD Group : The name of a group in the LDAP Directory that all authenticating users belong to. The group name must also be added to WatchGuard’s list of groups authorized to authenticate using SSL. By default this is only the SSLVPN-Users group, but other groups can be added manually from the WatchGuard Web UI.

Click Test to validate the values and then click Next.
Existing RADIUS Server Option
If you want to use your existing RADIUS server, select RADIUS:
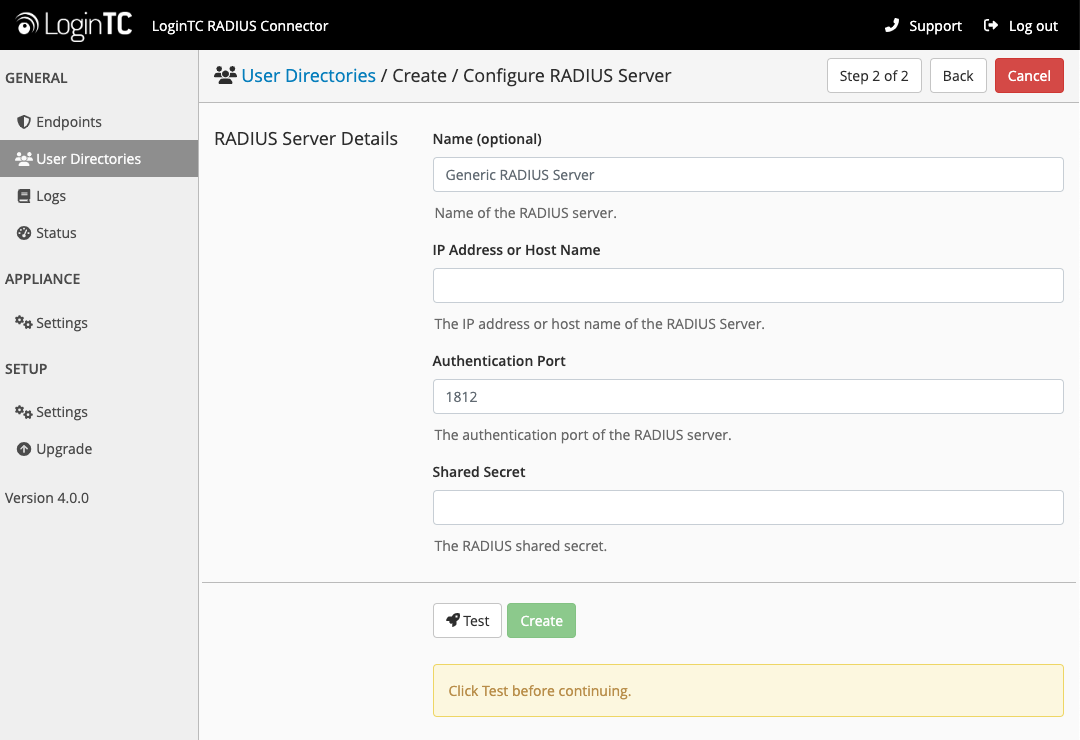
Configuration values:
| Property | Explanation | Examples |
|---|---|---|
IP Address or Host Name |
Host or IP address of the RADIUS server | radius.example.com or 192.168.1.43 |
Authentication Port (optional) |
Port if the RADIUS server uses non-standard (i.e., 1812) |
1812 |
Shared Secret |
The secret shared between the RADIUS server and the LoginTC RADIUS Connector | testing123 |
RADIUS Vendor-Specific Attributes
Common Vendor-Specific Attributes (VSAs) returned by the RADIUS server will be relayed.Click Test to validate the values and then click Next.
Challenge Strategy / Passthrough
Configure which users will be challenged with LoginTC. This allows you to control how LoginTC will be phased in for your users. This flexibility allows for seamless testing and roll out.
For example, with smaller or proof of concept deployments select the Static List option. Users on the static list will be challenged with LoginTC, while those not on the list will only be challenged with the configured First Authentication Factor. That means you will be able to test LoginTC without affecting existing users accessing your VPN.
For larger deployments you can elect to use the Active Directory or LDAP Group option. Only users part of a particular LDAP or Active Directory Group will be challenged with LoginTC. As your users are migrating to LoginTC your LDAP and Active Directory group policy will ensure that they will be challenged with LoginTC. Users not part of the group will only be challenged with the configured First Authentication Factor.
Challenge All Users
Select this option if you wish every user to be challenged with LoginTC.
Challenge Users Based on Static Username List
Select this option if you wish to have a static list of users that will be challenged with LoginTC. Good for small number of users.
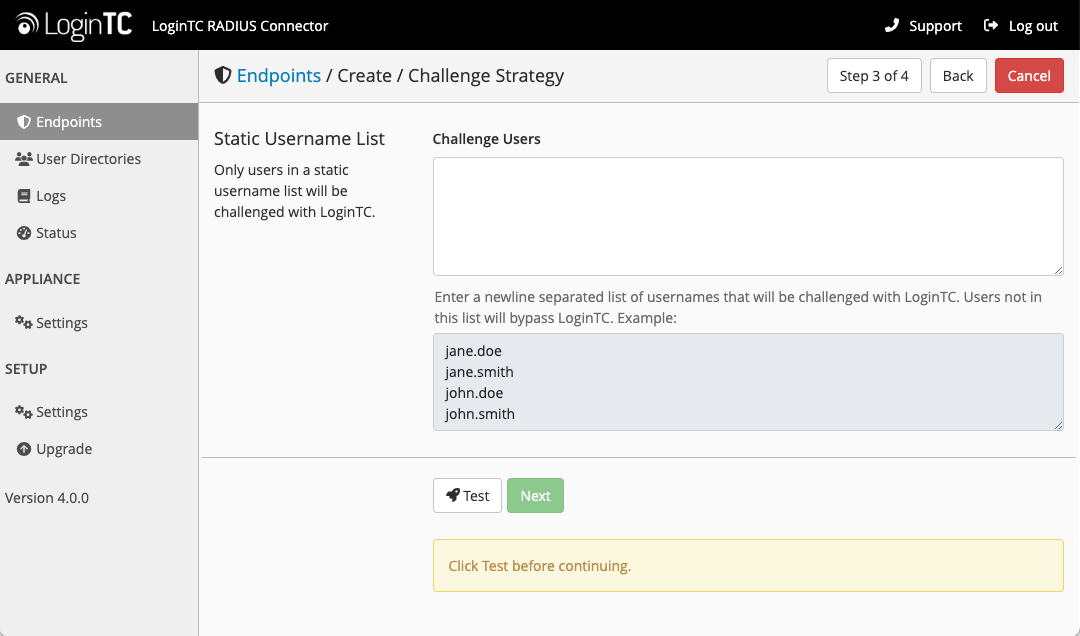
LoginTC challenge users: a new line separated list of usernames. For example:
            jane.doe
            jane.smith
            john.doe
            john.smith
Challenge Users Based on Group Membership
Select this option if you wish to have only users part of a particular Active Directory or LDAP group to be challenged with LoginTC. Good for medium and large number of users.
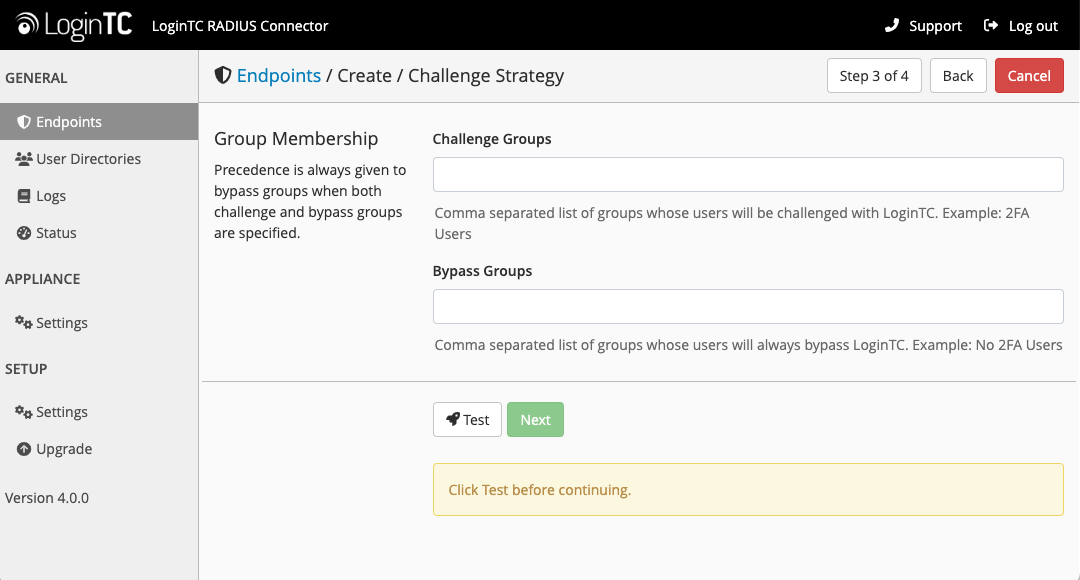
Configuration values:
| Property | Explanation | Examples |
|---|---|---|
Challenge Groups (Optional) |
Comma separated list of groups for which users will be challenged with LoginTC | SSLVPN-Users or two-factor-users |
Challenge Groups (Optional) |
Comma separated list of groups for which users will always bypass LoginTC | NOMFA-Users |
Click Test to validate the values and then click Next.
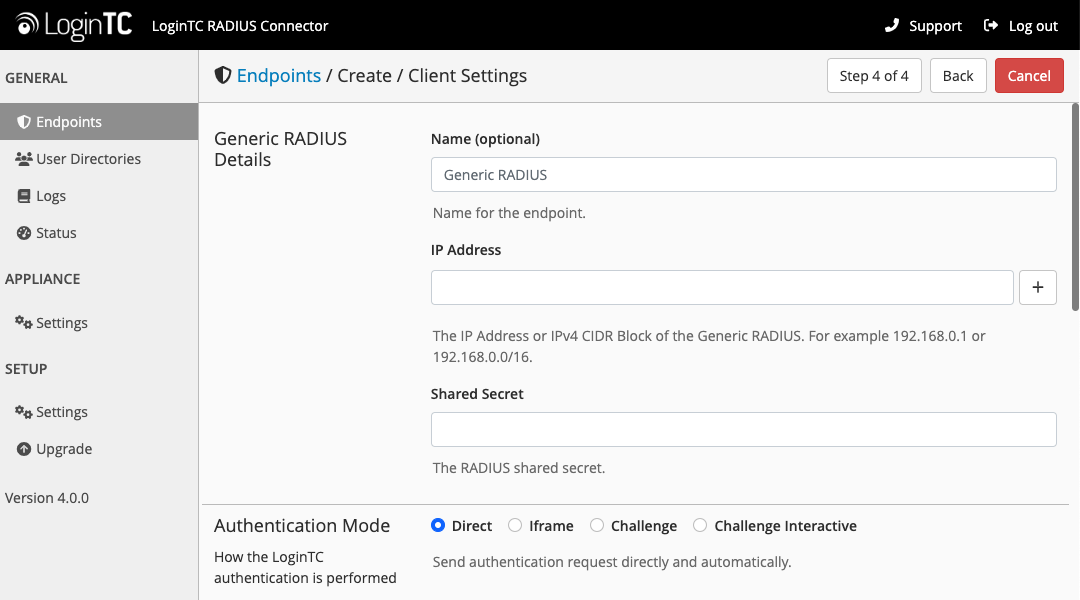
Client Settings
Configure RADIUS client (e.g. your RADIUS-speaking VPN):
Client configuration values:
| Property | Explanation | Examples |
|---|---|---|
name |
A unique identifier of your RADIUS client | CorporateVPN |
IP Addresss |
The IP address of your RADIUS client (e.g. your RADIUS-speaking VPN). Add additional IP Addresses by clicking plus. | 192.168.1.44 |
Shared Secret |
The secret shared between the LoginTC RADIUS Connector and its client | bigsecret |
Under Authentication Mode select Challenge
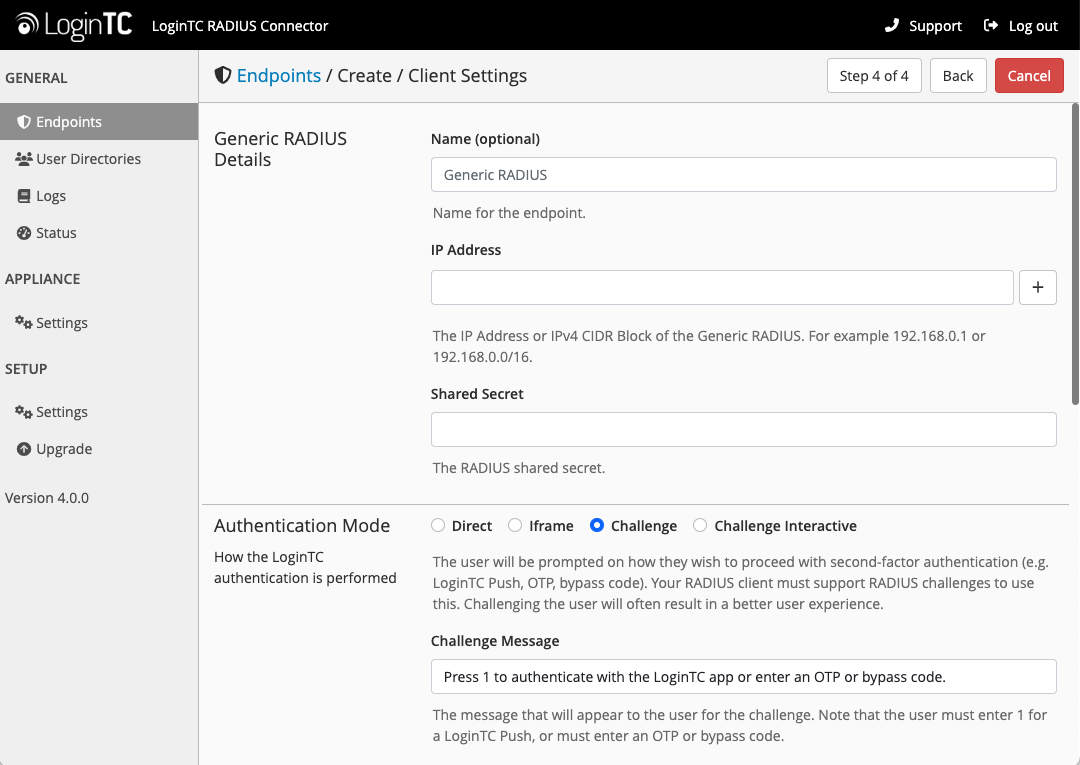
The user will be prompted on how they wish to proceed with second-factor authentication (e.g. LoginTC Push, OTP, bypass code). Your RADIUS client must support RADIUS challenges to use this. Challenging the user will often result in a better user experience. See User Experience for more information.
Click Test to validate the values and then click Save.
 Testing
When you are ready to test your configuration, create a LoginTC user (if you haven’t already done so). The username should match your existing user. Provision a token by following the steps:
- In a new tab / window log into the LoginTC Admin Panel
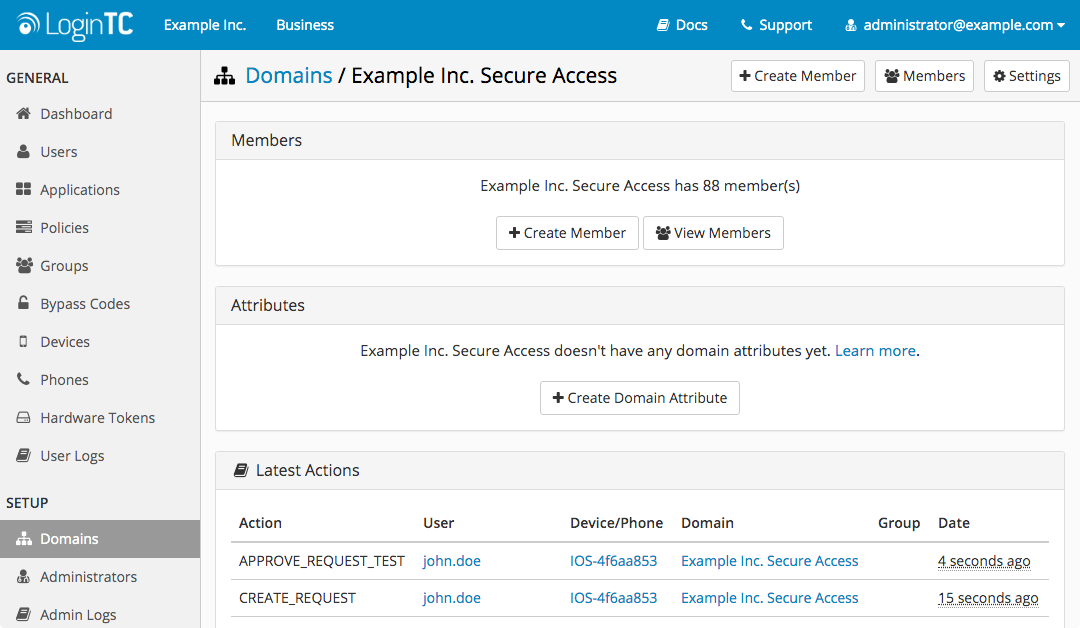
- Click Domains
- Click on your domain
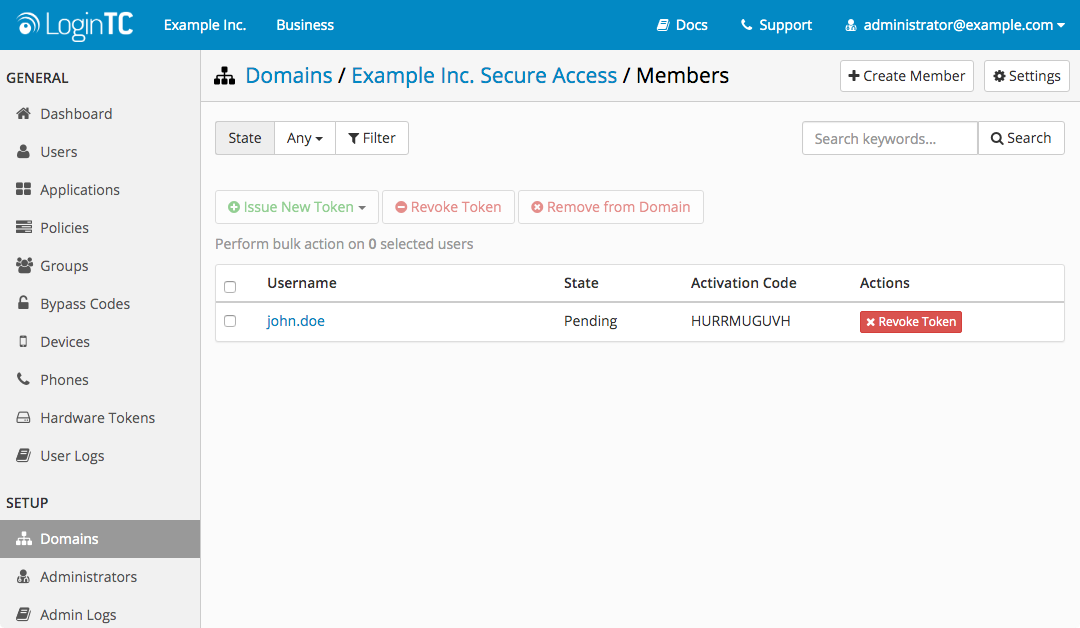
- Click on Members
- Click Issue Token button beside your user:
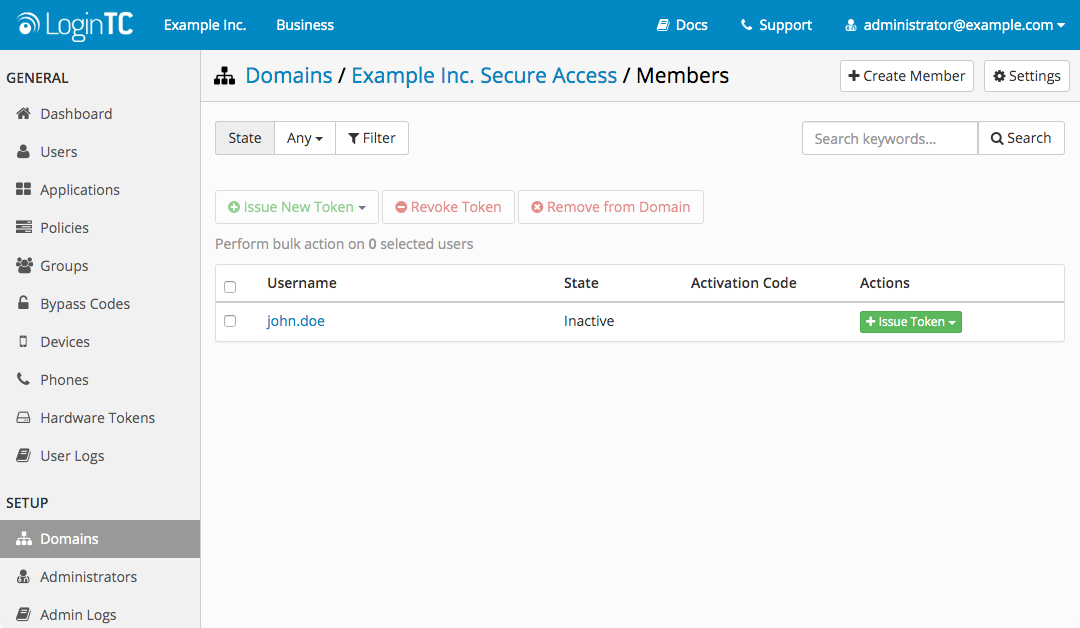
- A 10-character alphanumeric activation code will appear beside the user:
- Open the LoginTC mobile app.
- Enter the 10-character alphanumeric activation code:
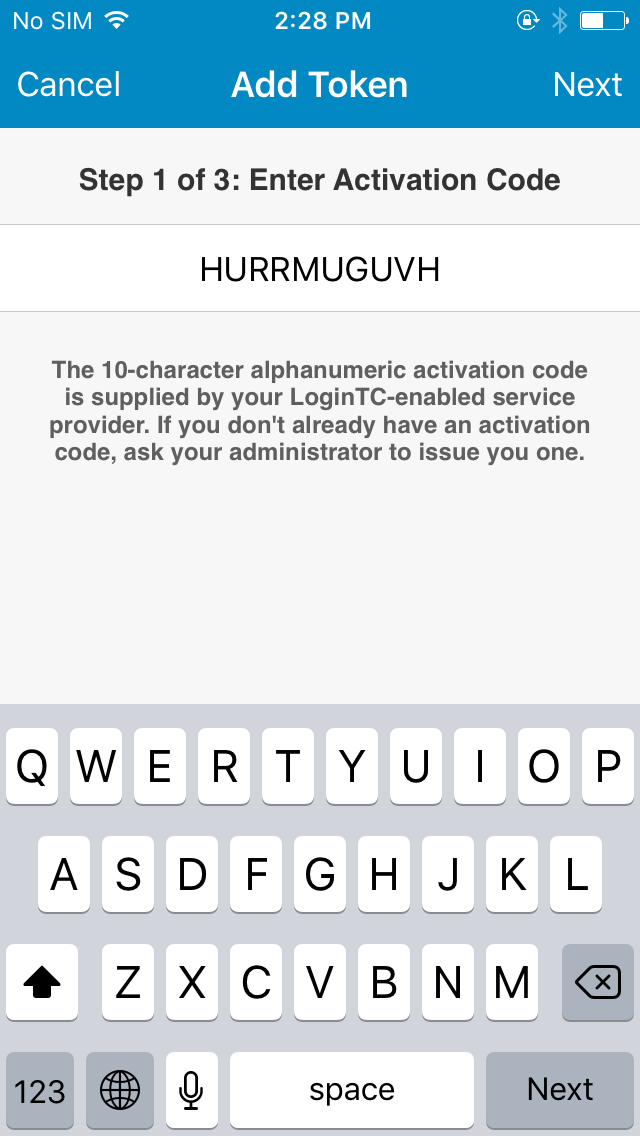
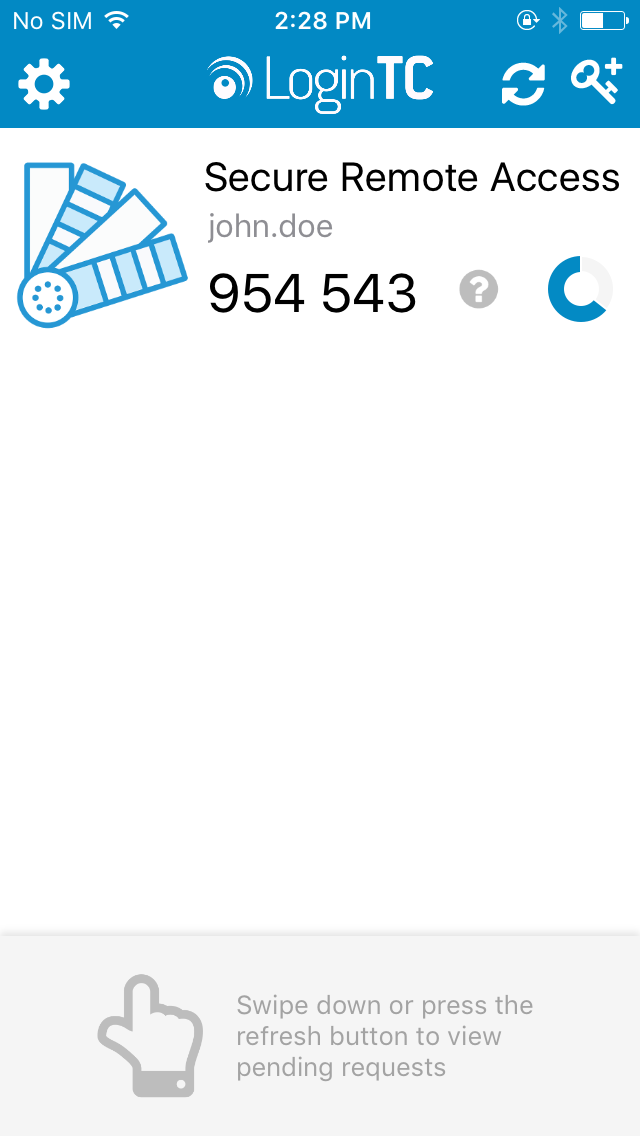
- Load the token to complete the process
When you have loaded a token for your new user and domain, navigate to your appliance web interface URL:
Click Test Configuration:
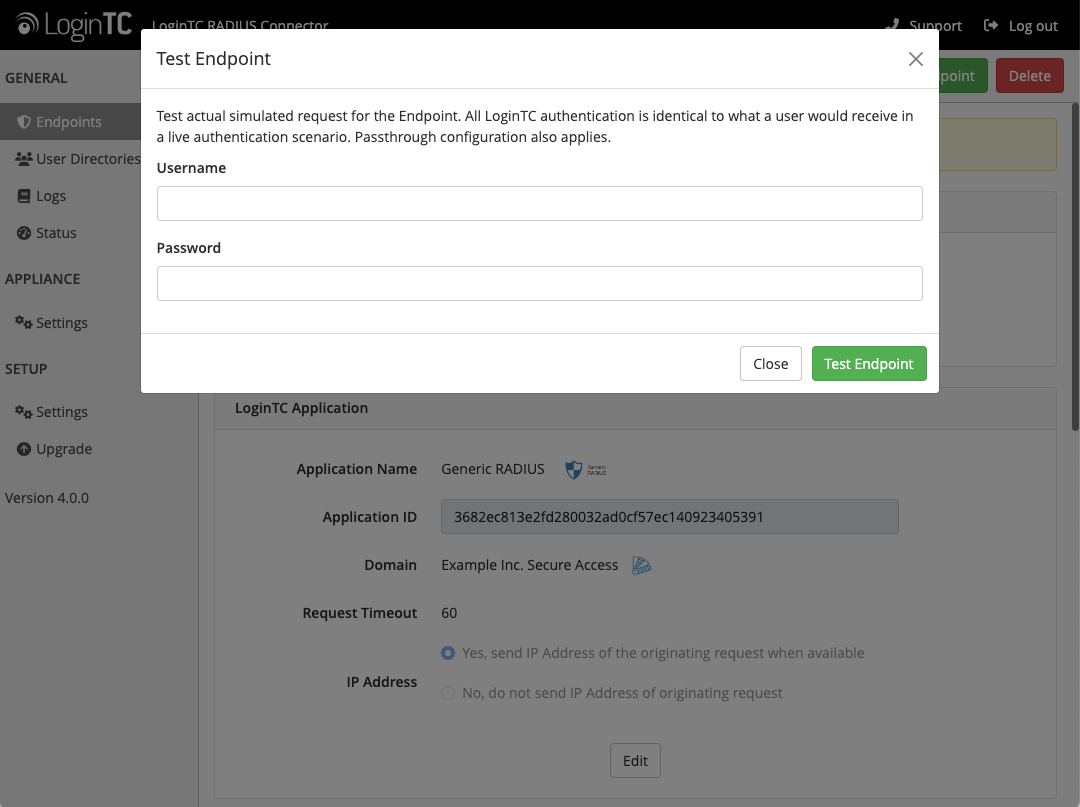
Enter a valid username and password; if there is no password leave it blank. A simulated authentication request will be sent to the mobile or desktop device with the user token loaded. Approve the request to continue:
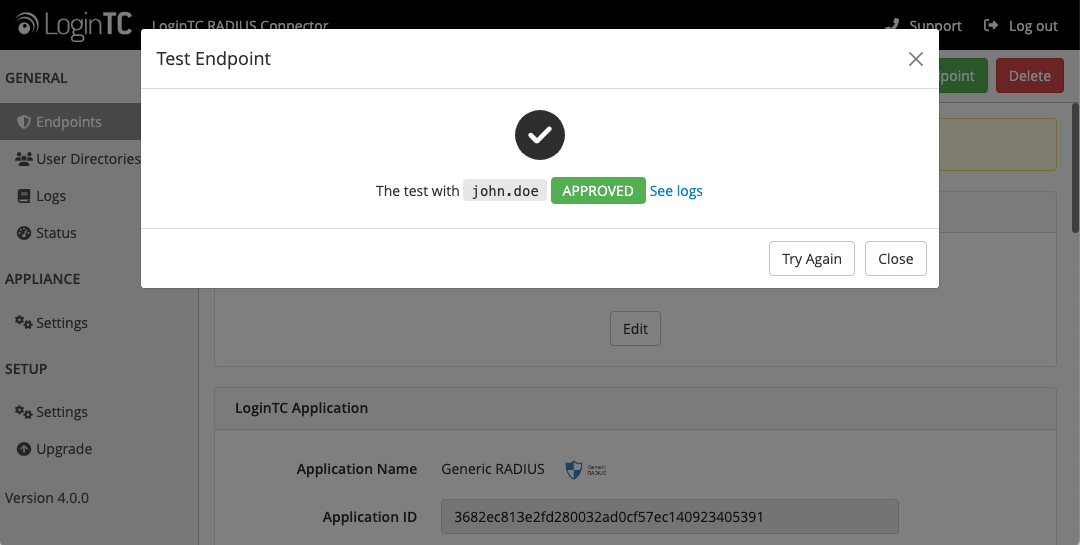
Congratulations! Your appliance can successfully broker first and second factor authentication. The only remaining step is to configure your RADIUS device!
If there was an error during testing, the following will appear:
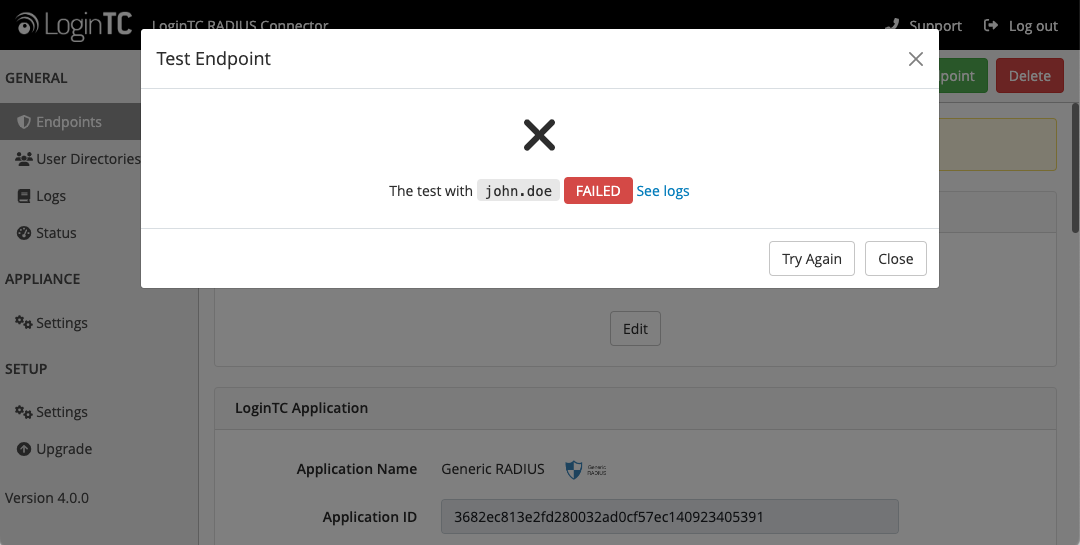
In this case, click See logs (or click the Logs section):
Once you are satisfied with your setup, configure your WatchGuard to use the LoginTC RADIUS Connector.
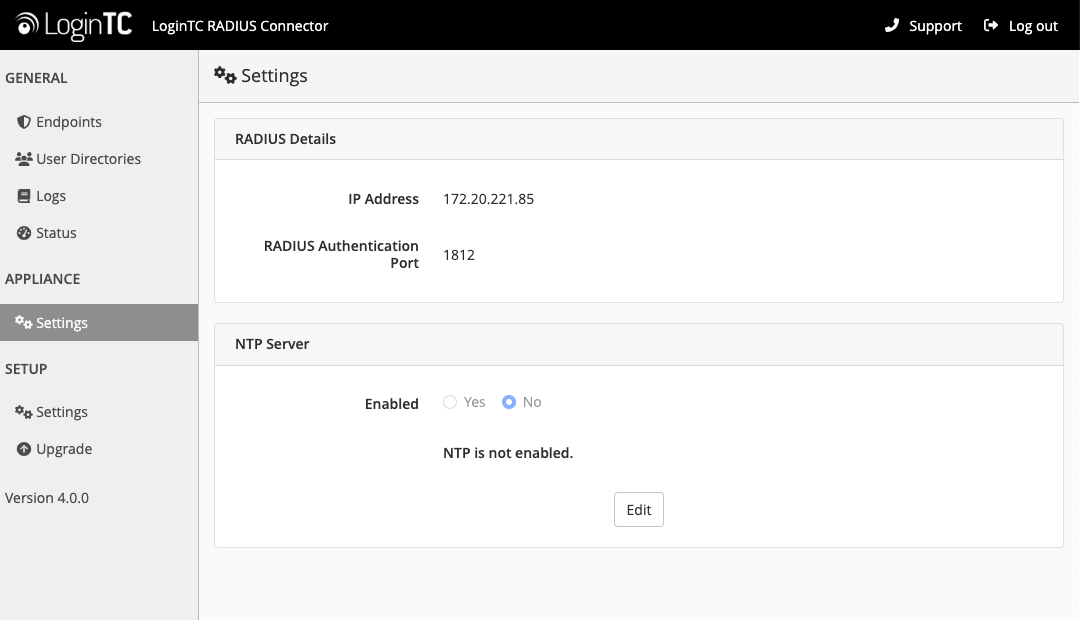
For your reference, the appliance web interface Settings page displays the appliance IP address and RADIUS ports:
The following are quick steps to get VPN access protected with LoginTC. The instructions can be used for existing setups as well. Although these were performed on WatchGuard Fireware XTM Web UI, the same is true for other devices in the XTM series.
Mobile VPN with IPsec
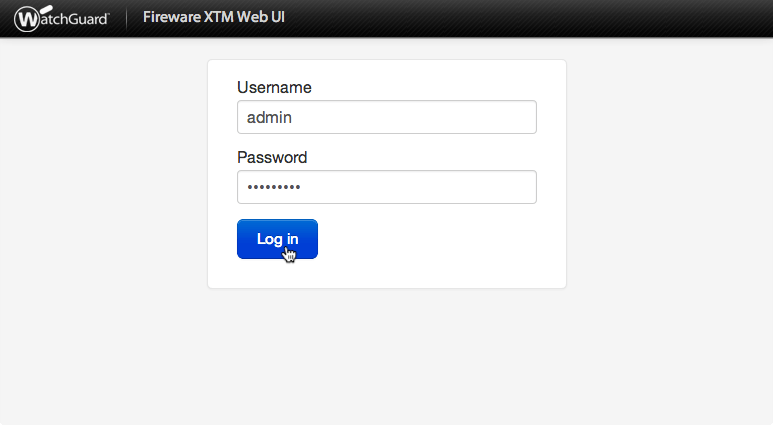
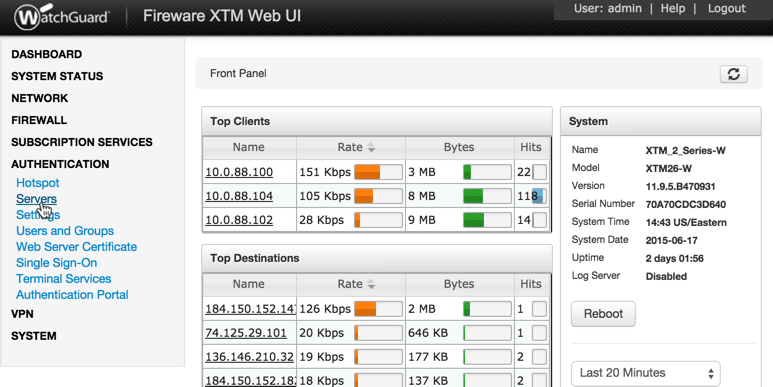
- Log in to your WatchGuard (Fireware XTM Web UI)
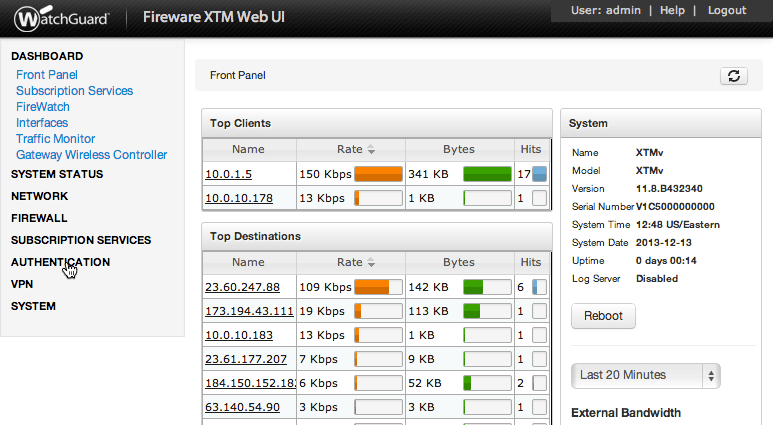
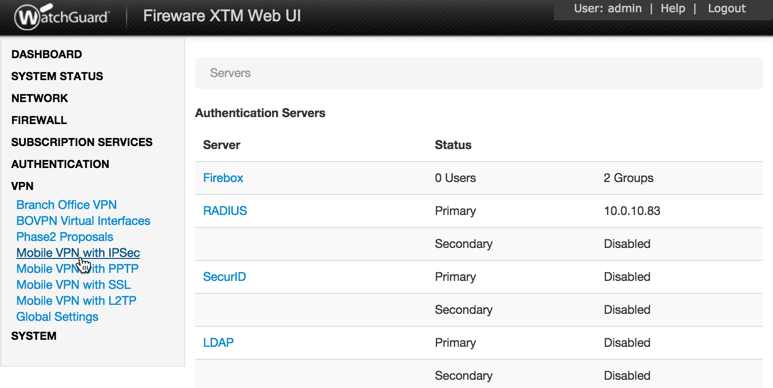
- Click Authentication:
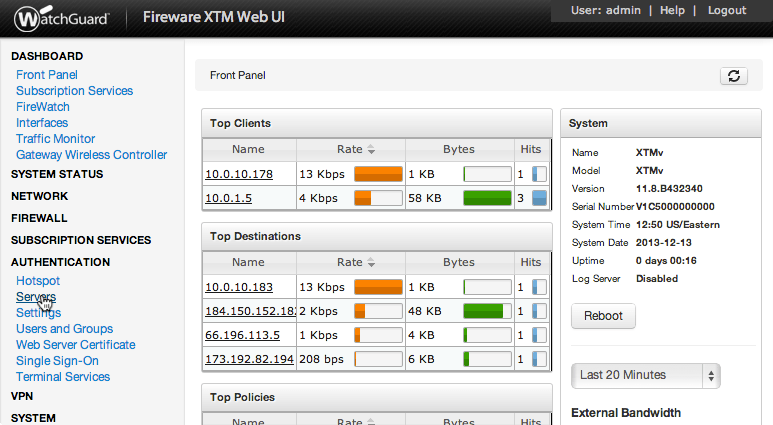
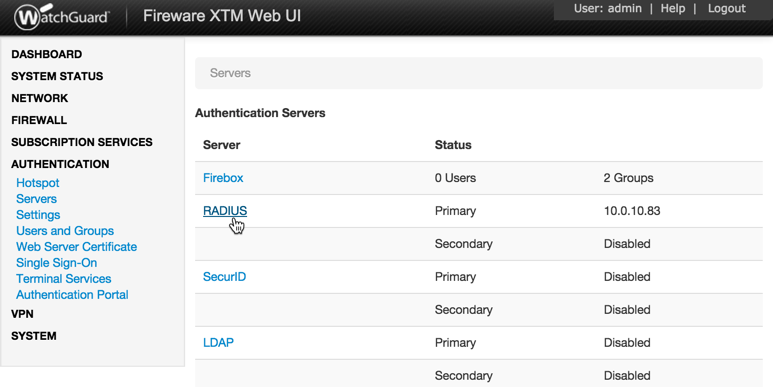
- Under Authentication click Servers:
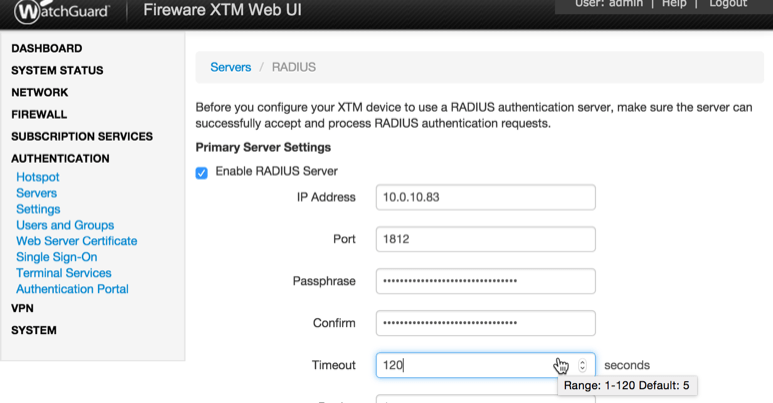
- Under Authentication Servers click RADIUS:
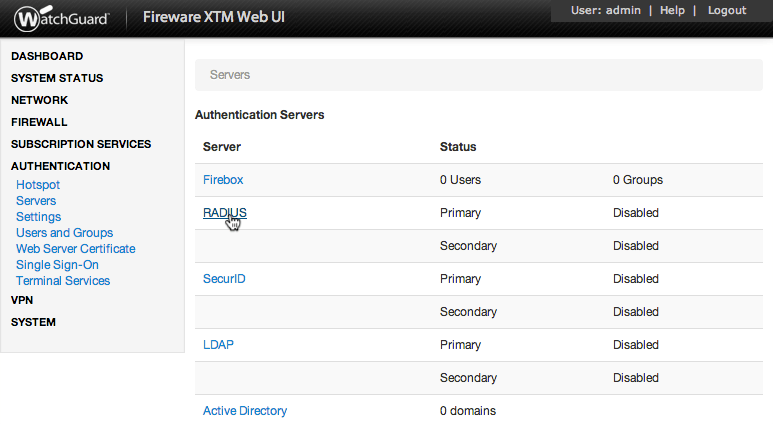
- Under Primary Server Settings click Enable RADIUS Server:
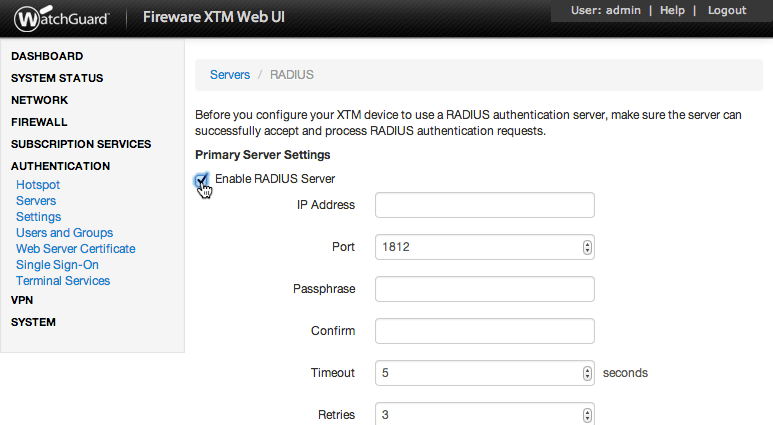
- Complete Primary Server Settings form:
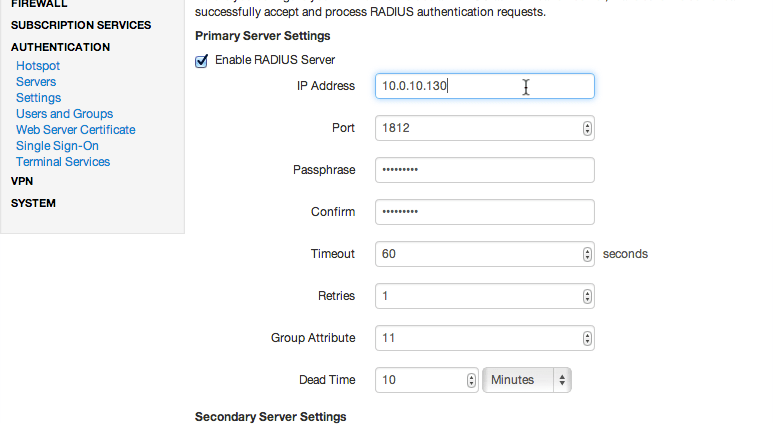
Property Explanation Example IP AddressAddress of LoginTC RADIUS Connector 10.0.10.130 PortRADIUS authentication port. Must be 1812. 1812 PassphraseThe secret shared between the LoginTC RADIUS Connector and its client bigsecret ConfirmThe secret shared between the LoginTC RADIUS Connector and its client bigsecret TimeoutAmount of time in seconds to wait. At least 90s. 90 RetriesAmount of times to retry authentication. Must be 1. 1 Group AttributeRADIUS Attribute to be populated with user group info. Must be 11 when using SSL. 11 Dead TimeAmount of time an unresponsive RADIUS server is marked as inactive 0
Group Attribute and Access Control
WatchGuard devices can use the Group Attribute value to set the attribute that carries the User Group information. This information is used for access control by certain VPN protocols.
If you are using multiple VPN protocols (such as SSL) then you may need to set the value to match their requirements.
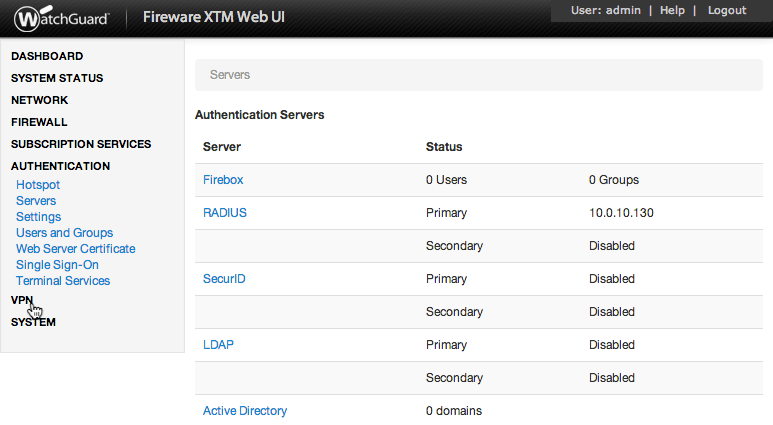
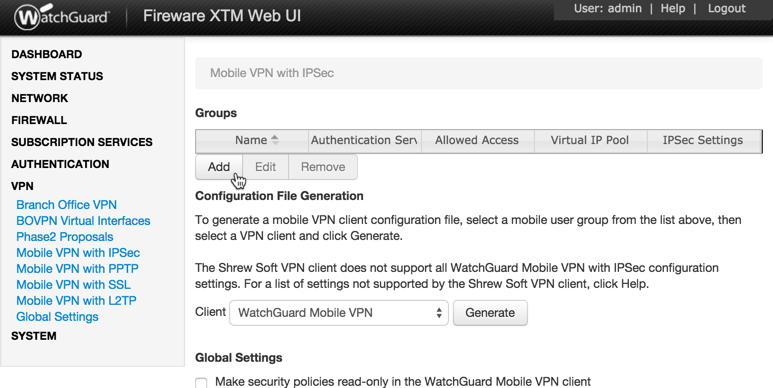
- Click VPN:
- Under VPN click Mobile VPN with IPsec
- Click Add to create a new group. Note that the name of the group does not have to match any of the groups names in the LDAP Directory
- In General Settings, complete the form and select RADIUS as the authentication server.
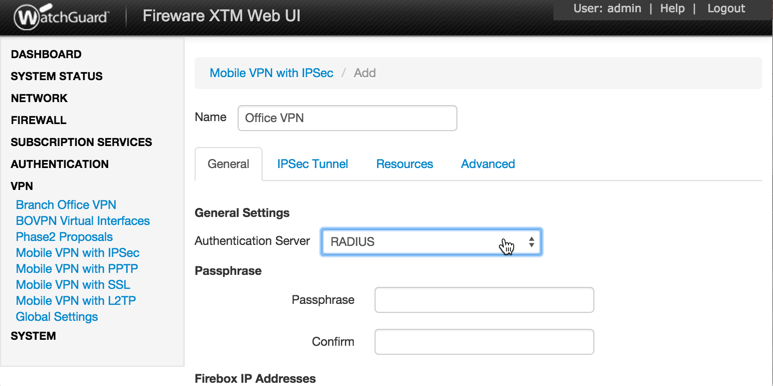
Property Explanation Example NameA unique name for this group configuration. This name must match exactly the LDAP / AD group name configured in First Factor authentication Group Attribute (advanced). Office VPN Authentication ServerThe type of device that users of this group will be authenticated with. Radius PassphraseThe secret shared between the Mobile VPN client and the RADIUS server. The secret must be provided to all IPsec users. sharedsecret ConfirmThe secret shared between the Mobile VPN client and the RADIUS server. sharedsecret PrimaryPrimary IP address or domain name Firebox users connect to. 10.0.10.130 Backup(optional)Secondary IP address or domain name Firebox users connect to. 10.0.10.131
Mobile VPN with IPSec group profile name
In order to use Mobile VPN with IPSec, the Mobile VPN with IPSec group profile name must match exactly the LDAP / AD group name configured in First Factor authentication Group Attribute (advanced).
- Fill out the forms under the IPsec Tunnel, Resources, and Advanced tabs to match the settings of your client. For more information about IPsec client configurations, check the WatchGuard Documentation
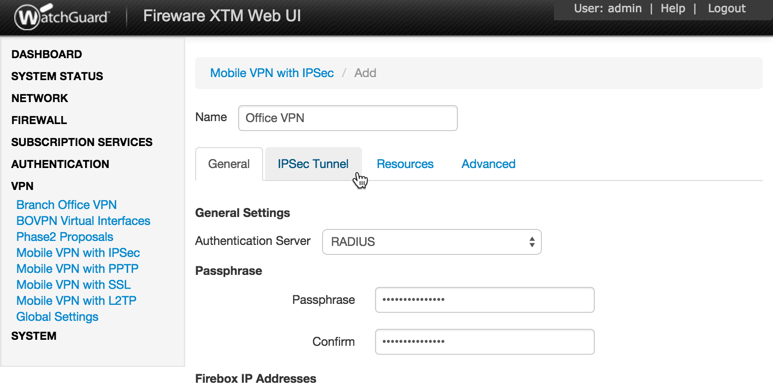
- Click Save
You are now ready to test your configuration.
To test IPsec connections, use an IPsec VPN client such as the WatchGuard Mobile Application.
User ManagementThere are several options for managing your users within LoginTC:
- Individual users can be added manually in LoginTC Admin Panel
- Bulk operations using CSV Import
- Programmatically manage user lifecycle with the REST API
- One-way user synchronization of users to LoginTC Admin is performed using User Sync Tool.
WatchGuard devices have built-in settings that make it easy to configure a secondary RADIUS server to provide failover.
After three authentication attempts fail, Fireware XTM uses the secondary RADIUS server for the next authentication attempt. If the secondary server also fails to respond after three authentication attempts, Fireware XTM waits for the Dead Time interval (10 minutes by default) to elapse. After the Dead Time interval has elapsed, Fireware XTM tries to use the primary RADIUS server again.
To set up another RADIUS server, deploy the downloaded LoginTC Connector again (you can deploy it multiple times) and configure it using the same settings as the first one. Click here to review the Connector configuration process. Afterwards, login to your WatchGuard Web UI and make the following changes:
- Select Authentication from the left-hand navigation bar

- Click Servers
- Select RADIUS
- Check the box to Enable Secondary RADIUS Server
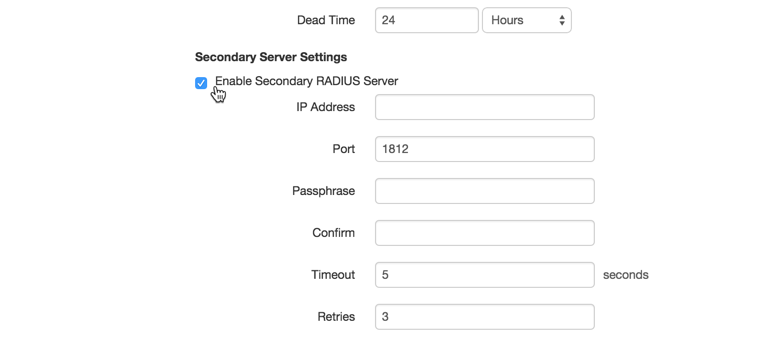
- Complete the Secondary Server Settings Form using the same settings as the primary one
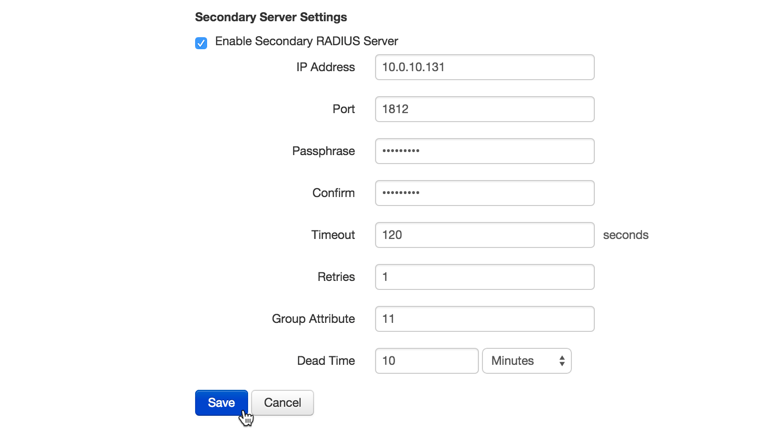
Property Explanation Example IP AddressAddress of Secondary LoginTC RADIUS Connector 10.0.10.131 PortRADIUS authentication port. Must be 1812. 1812 PassphraseThe secret shared between the LoginTC RADIUS Connector and its client newsecret ConfirmThe secret shared between the LoginTC RADIUS Connector and its client newsecret TimeoutAmount of time in seconds to wait. Must be at least 10 seconds longer than the LoginTC Request Timeout. 70 RetriesAmount of times to retry authentication. Must be 1. 1 Group AttributeRADIUS Attribute to be populated with user group info. Must be 11. 11 Dead TimeAmount of time an unresponsive RADIUS server is marked as inactive before the WatchGuard device attempts to connect to it again 10 - Click Save

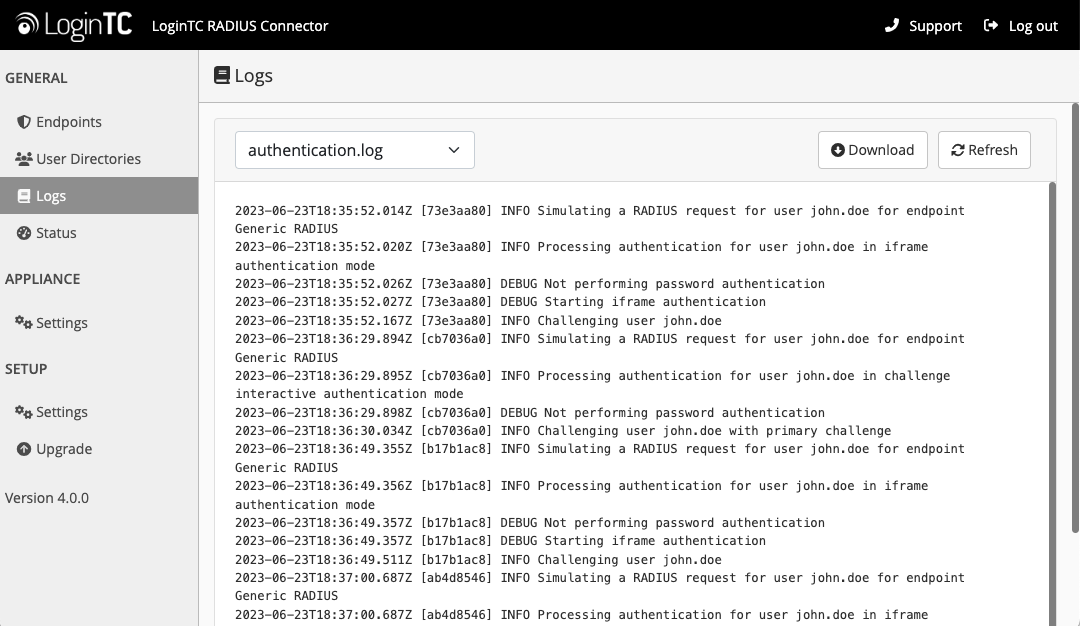
Logs can be found on the Logs tab:
User Receives Multiple LoginTC Requests
See the Knowledge Base articles:
- My WatchGuard SSL VPN users receive multiple LoginTC requests. What can I do?
- My WatchGuard IPSec VPN users receive multiple LoginTC requests. What can I do?
Authentication times out
See the Knowledge Base articles:
- My WatchGuard SSL VPN users receive multiple LoginTC requests. What can I do?
- My WatchGuard IPSec VPN users receive multiple LoginTC requests. What can I do?
No Network Connection
- First ensure that your LoginTC RADIUS Connector is configured to have a virtual network adapter on
eth0 - Ensure that the virtual network adapter MAC address matches the one in the file
/etc/sysconfig/network-scripts/ifcfg-eth0 - Restart the networking service:
service network restart - If you notice the error that
eth0is not enabled, then check driver messages for more information:dmesg | grep eth - It’s possible that the virtualization software renamed the network adapter to
eth1. If this is the case, rename/etc/sysconfig/network-scripts/ifcfg-eth0toifcfg-eth1.mv /etc/sysconfig/network-scripts/ifcfg-eth0 /etc/sysconfig/network-scripts/ifcfg-eth1Open the file and update the
DEVICE="eth0"line toDEVICE="eth1"
Not Authenticating
If you are unable to authenticate, navigate to your appliance web interface URL and click Status:
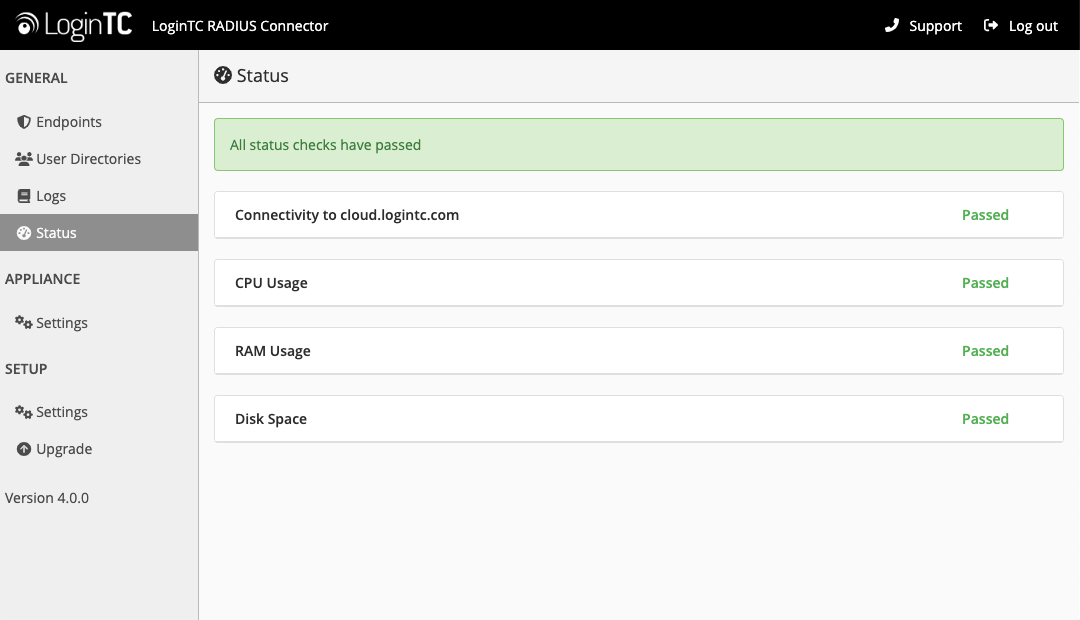
Ensure that all the status checks pass. For additional troubleshooting, click Logs:
Unsuccessful authentication may be caused by premature timeouts
If you have activated Mobile VPN with SSL, check that your Group Attributes are configured correctly.
Email Support
For any additional help please email support@cyphercor.com. Expect a speedy reply.
Incorrect Group Settings
If you are using a Mobile VPN protocol such as SSL and are unable to authenticate, check that your Group Attributes are configured correctly. Navigate to your WatchGuard Web UI and click Dashboard in the left-hand navigation bar: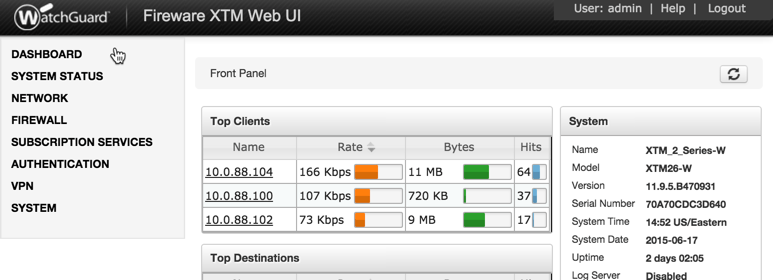
Click on Traffic Monitor: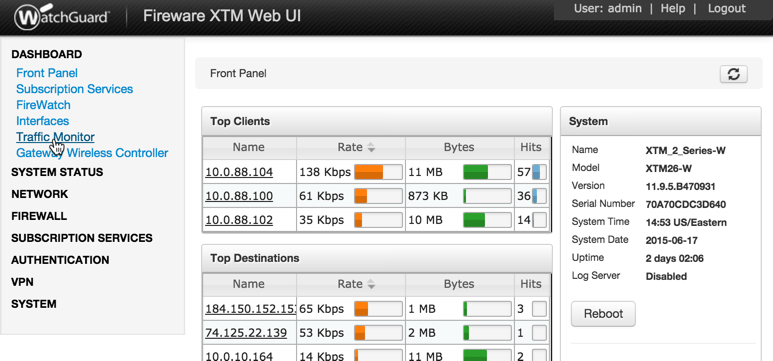
Select Diagnostic from the table header options: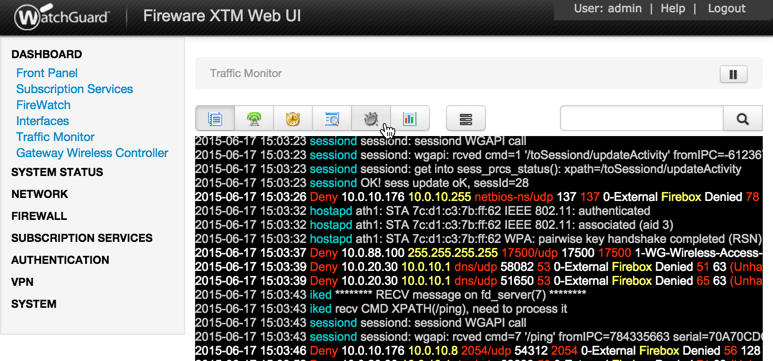
If you can find the following error message then there is a problem with your Group Attribute settings:
2015-XX-XX 16:52:41 admd Authentication failed: user username@RADIUS isn't in the authorized SSLVPN group/user list!
Search for the following error message:
2015-XX-XX 16:59:52 admd RADIUS: no attribute-value pair is retrieved from packet
If found, it means that the RADIUS Connector is not sending back any Group Attribute information. Navigate to your appliance web interface and click Configurations. Select the endpoint you’re having problems with:
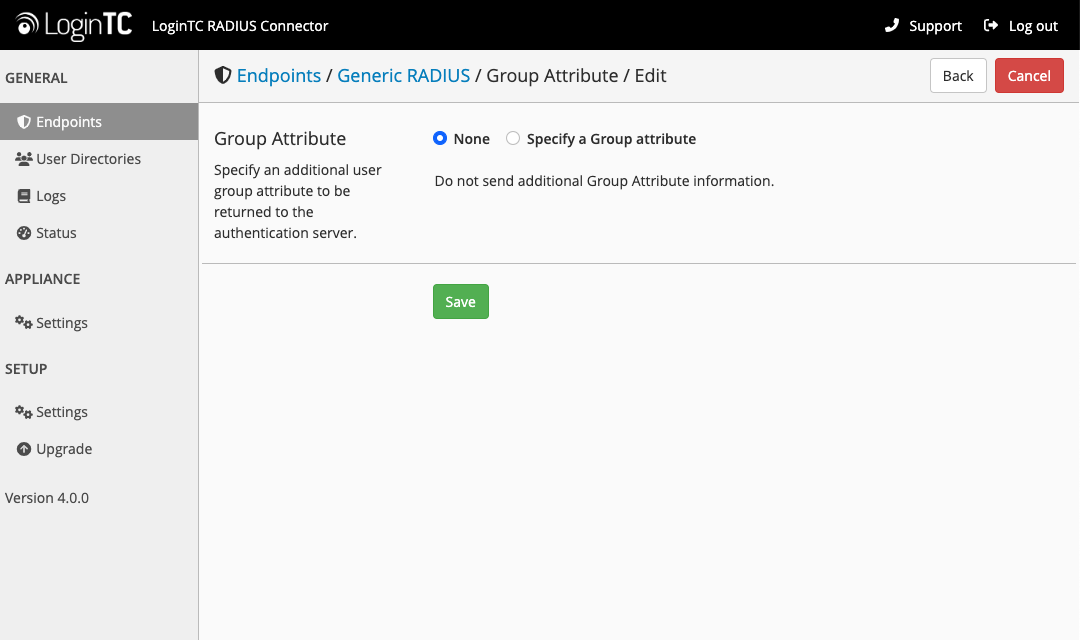
Scroll down to the User Directory section and next to Group Attribute click Edit: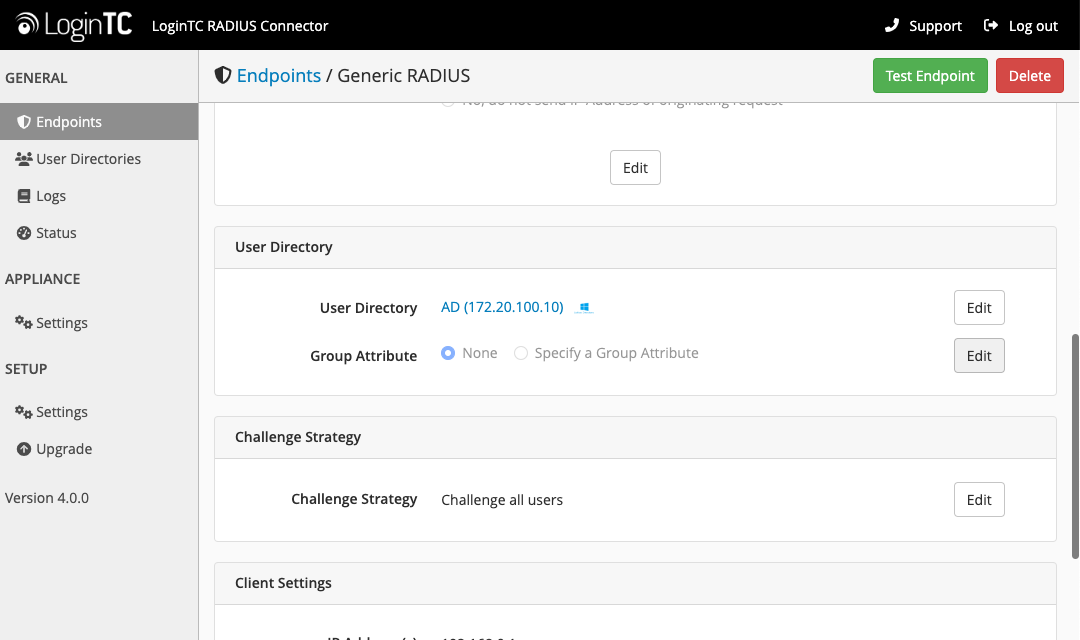
- If “None” is selected, change it to “Specify a group attribute”. Click here to review how to configure the Group Attribute for SSL
- Otherwise, check that your user is a member of the specified group in the LDAP Directory. If they are not, it will cause RADIUS to return a blank attribute.
If you find a log message similar to this:
                2015-XX-XX 16:52:41 admd RADIUS: finished parsing attribute-value pairs
                2015-XX-XX 16:52:41 admd RADIUS: group 1, type=11 value=L2TP-Users
                2015-XX-XX 16:52:41 admd RADIUS: retrieve VP:Filter-Id(11) int=10
Then the RADIUS server is sending back a Group Attribute, but it may not be the correct one.
Check that the value is the name of the group that has been added to list of groups authorized to authenticate with SSL. Log into the WatchGuard Web UI and select VPN from the left-hand navigation bar. Click on Mobile VPN with SSL :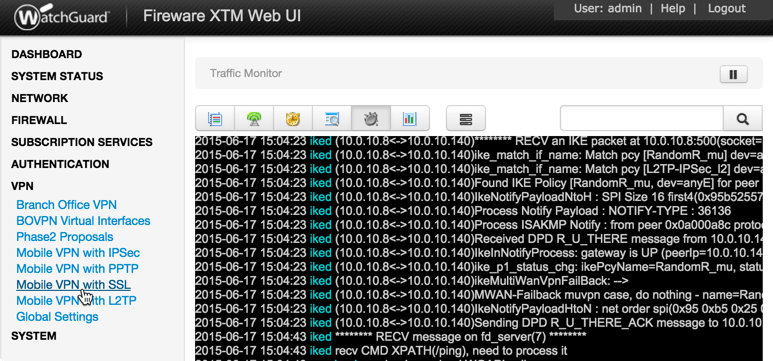
Click on the Authentication tab: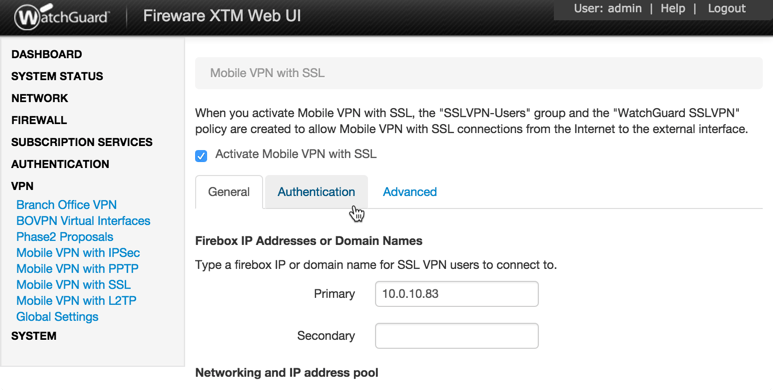
The bottom table contains the list of groups that are authorized to connect with SSL. If the group returned by the RADIUS server is not part of it, it must be added. Click the Add button: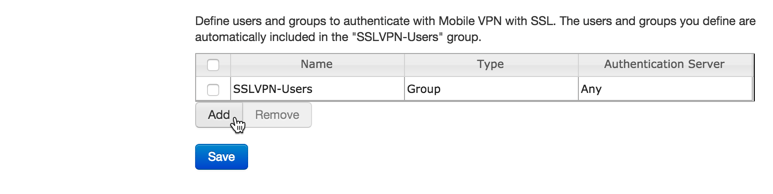
Type in the group name and select RADIUS as the Authentication Server: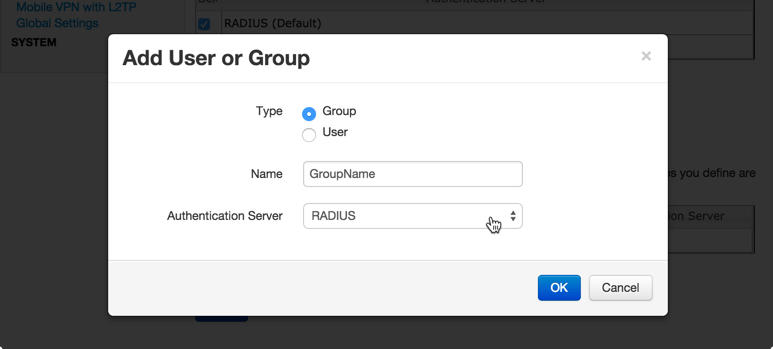
Authentication Timing Out
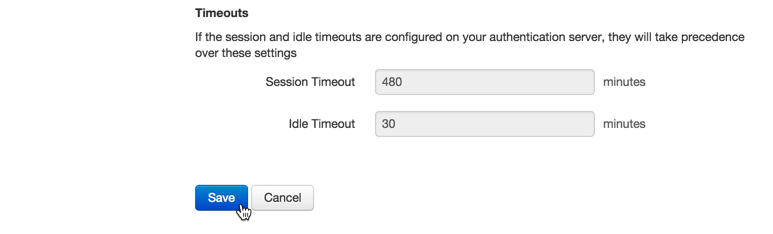
If authentication is failing, it is possible that the authentication requests are timing out too quickly. By default, LoginTC push requests will timeout after 90 seconds. Another timeout value is defined by the RADIUS server configuration. If it is set too low, it will cause requests to prematurely timeout. To check, login to your WatchGuard Web UI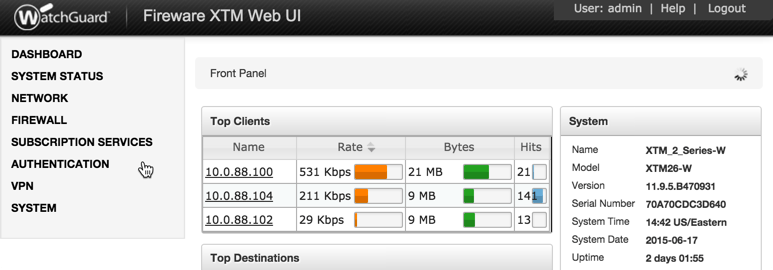
- Select Authentication from the left-hand navigation bar, then click Servers

- Click RADIUS

- Check the Timeout attribute field. It should be at least 10 seconds longer than the LoginTC Request Timeout set in the LoginTC RAIDUS Connector.
See the Knowledge Base articles for more information:
- My WatchGuard SSL VPN users receive multiple LoginTC requests. What can I do?
- My WatchGuard IPSec VPN users receive multiple LoginTC requests. What can I do?
Email Support
For any additional help please email support@cyphercor.com. Expect a speedy reply.
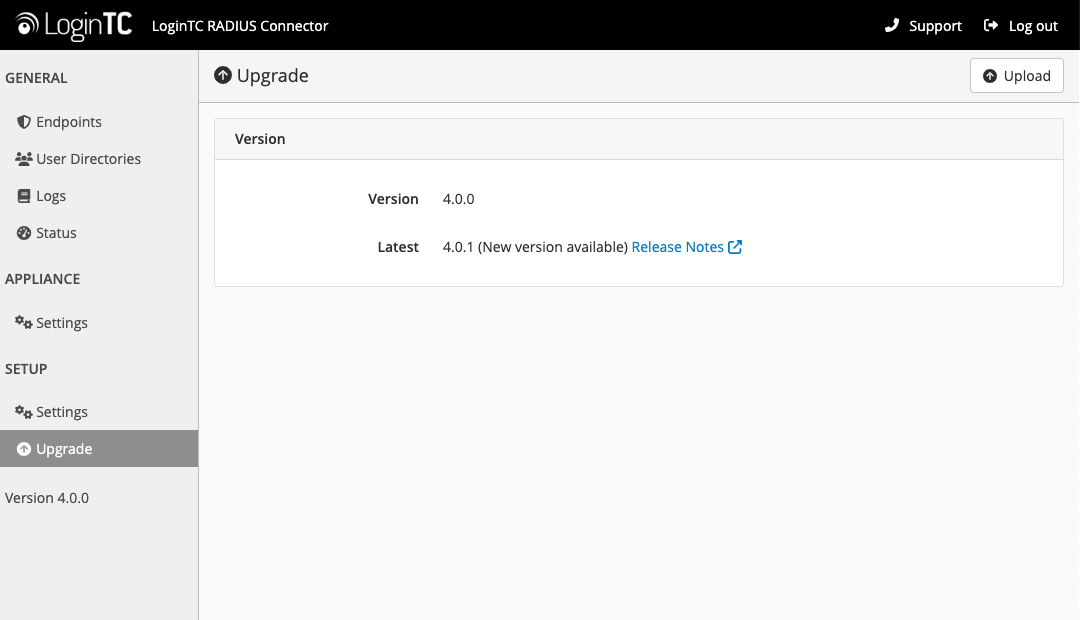
From 4.X
The latest LoginTC RADIUS Connector upgrade package can be downloaded here: Download RADIUS Connector (Upgrade)- Navigate to SETUP > Upgrade:
- Click Upload and select your LoginTC RADIUS Connector upgrade file:
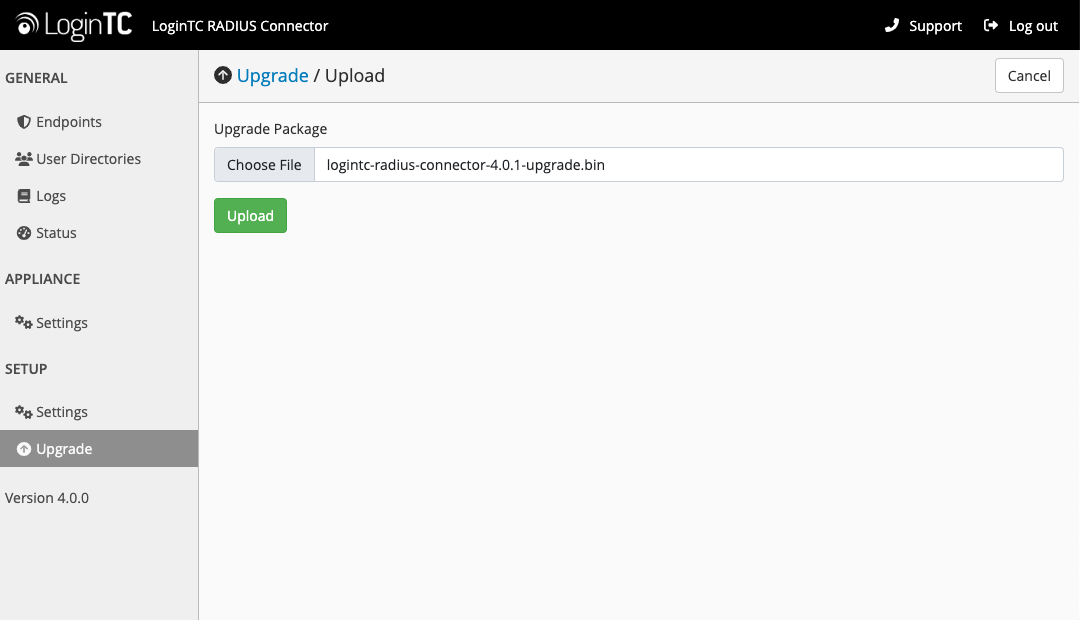
- Click Upload and do not navigate away from the page:
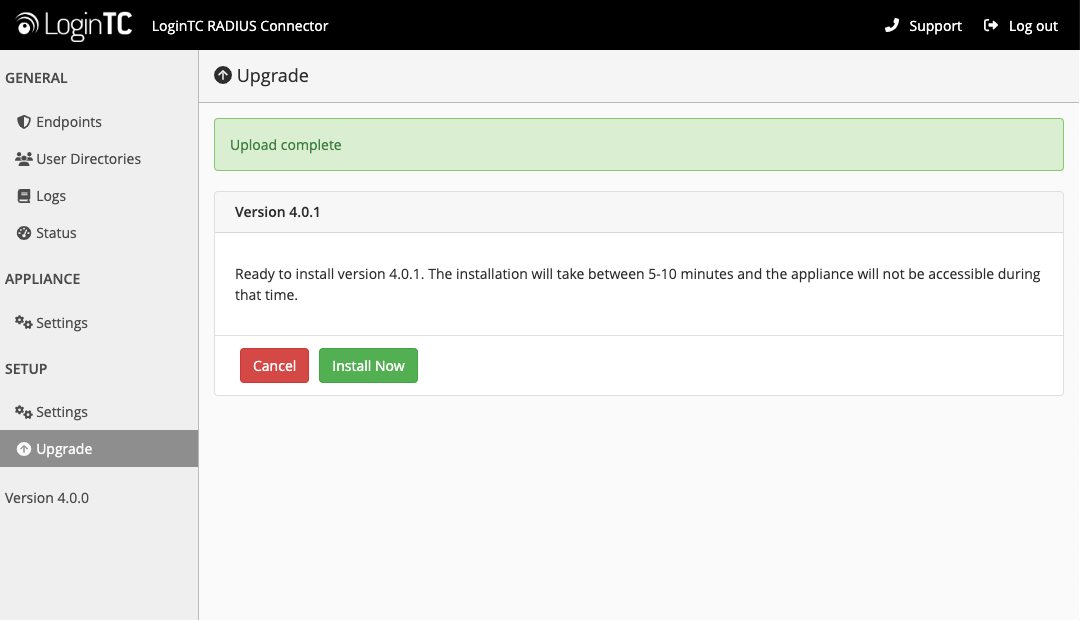
- Once upload is complete upgrade by clicking Install Now:
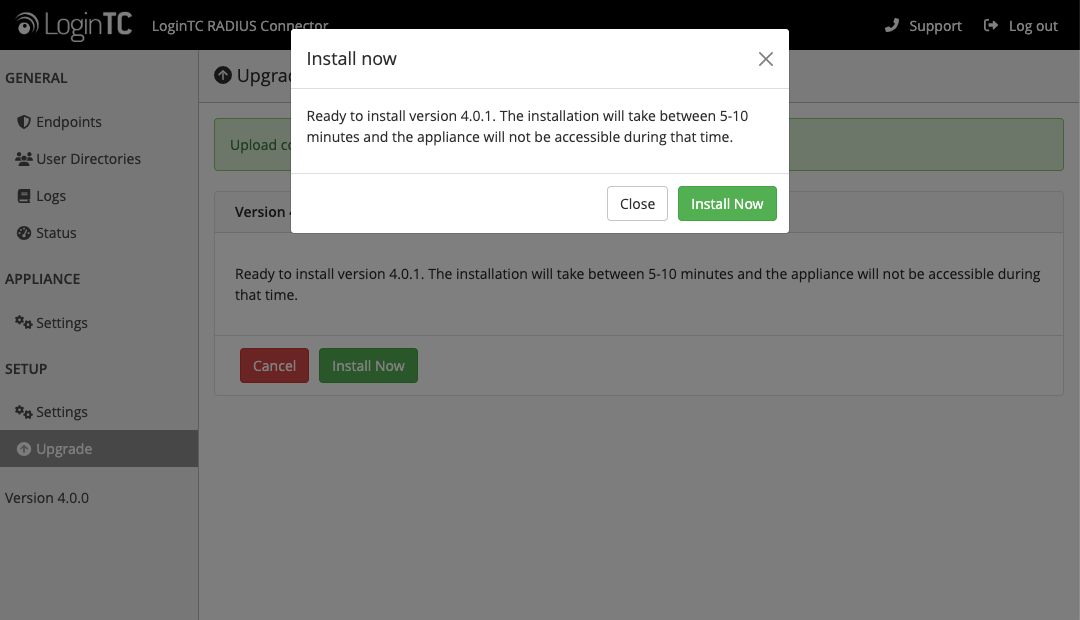
- Wait 10-15 minutes for upgrade to complete:
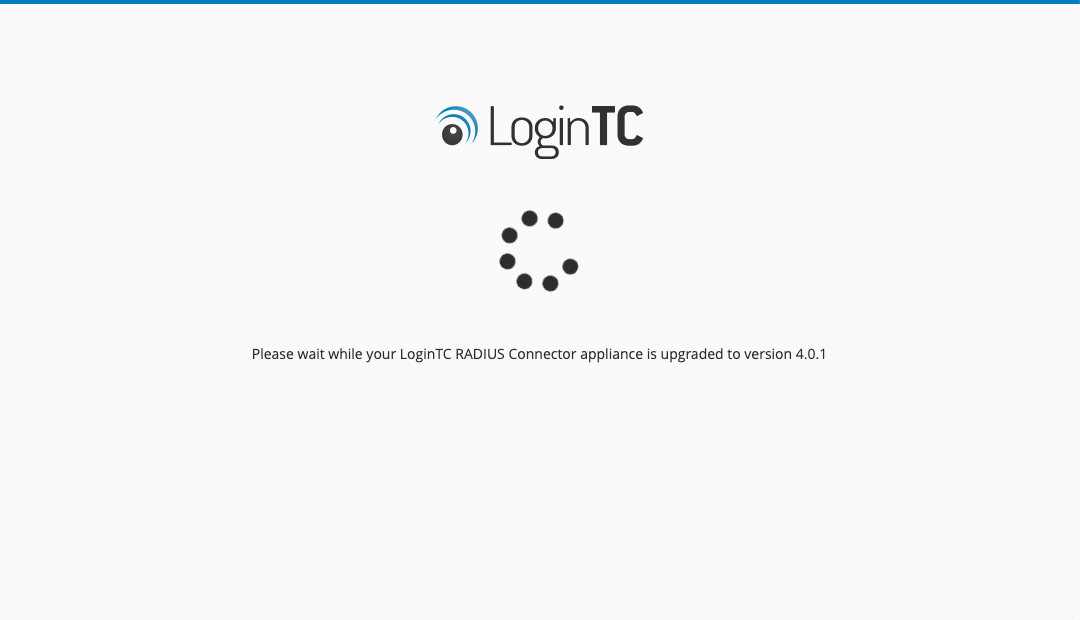
NOTE: Upgrade time
Upgrade can take 10-15 minutes, please be patient.
From 3.X
Important: LoginTC RADIUS Connector 3.X End-of-life
The LoginTC RADIUS Connector 3.X virtual appliance is built with CentOS 7.9. CentOS 7.X is End of Lifetime (EOL) June 30th, 2024. Although the appliance will still function it will no longer receive updates and nor will it be officially supported.
New LoginTC RADIUS Connector 4.X
A new LoginTC RADIUS Connector 4.X virtual appliance has been created. The Operating System will be supported for many years. Inline upgrade is not supported. As a result upgrade is deploying a new appliance. The appliance has been significantly revamped and although the underlying functionality is identical, it has many new features to take advantage of.
Complete 3.X to 4.X upgrade guide: LoginTC RADIUS Connector Upgrade Guide
Additional Resources